The Xero Blog

How to Transition to Barefoot Shoes

How to Transition to Barefoot Shoes

A lot of people ask us two common questions: aren’t barefoot shoes uncomfortable and don’t I need to transition over time? Barefoot shoes feature a foot-shaped design, thin and flexible zero-drop sole, and minimal cushioning. They’re quite the opposite of traditional footwear. Why Barefoot Shoes Feel Different at First If you’re entirely new to barefoot shoes and come from wearing highly cushioned shoes, it’s definitely a new sensation. It feels different.  If you’ve ever been in a cast, the feeling when you take it off awakens the casted muscles because they haven't been used properly. The same goes for wearing barefoot shoes for the first time. You’re using stabilizer muscles and tendons that may not get regular use.  When you put less between your feet and the ground, those muscles and tendons start working again as they bend and flex.  Would you go to the gym, put 100 pounds on the bar and lift it over and over until you felt so tired you could barely move? Probably not.  Give Your Feet Time to Adapt Just as you would gradually increase your weight or volume the more you work out, you should gradually increase the amount of time you spend moving in your barefoot shoes. It’s common to feel a little sore, just like you would when you start a new workout regime. It’s important to know that transitioning to barefoot shoes can be different for everyone. Start small. Build gradually. Let your body adapt. Tips to Transition to Barefoot Shoes Start simple with short walks, quick errands, or everyday activities. Then you can build gradually over time, depending on how you feel. Increase your time in barefoot shoes and you’ll notice your body adapt.  A transition period is expected, especially if you’re new to zero-drop and barefoot shoes. If your feet or calves feel a little sore, that’s normal! Pain is not.  Most people adjust faster than they expect, especially for walking and everyday wear. If you’ve been wearing cushioned zero-drop shoes, the transition will likely be quicker as well. Start Small Walk around the block, aiming for just 5-10 minutes Do your regular yardwork (if it’s not too muddy/dirty to mess up your new shoes) Wear on your quick trip to the grocery store Wear to the office if you have a desk job Wear while making dinner in the kitchen, where you’re standing and moving around in a small space Build Gradually Add 5 minutes to your walk every week Wear for your walking commute or daily dog walk Start wearing for low-impact strength training workouts like weight lifting Wear for a short, non-technical hike A Simple Barefoot Shoe Transition Plan Week 1: Wear them around the house, for short errands, or for a 5–10 minute walk. Week 2: Add a little more time if your body feels ready. Week 3 and beyond: Try longer walks, casual daily wear, or low-impact workouts. How Do I Know When to Increase Time?   Everyone’s transition will be different, because everyone’s feet are different. Start with short, easy sessions and build from there. If something keeps bothering you, scale back and give your body more time. Good signs:Your feet and calves feel fine, or any new sensation fades quickly. If you feel good, add a little more time/activity to your barefoot movement. Slow-down signs: Something feels painful or lingers longer than expected. If you notice lingering soreness, repeat the same amount of time before increasing. If that soreness sticks around, take a lighter day or skip a day. Once that soreness is mild or gone, you can increase.  First Barefoot Shoes: Top Picks Prio – a "do it all" sneaker Prio Coast – a hands-free slip-on sneaker Prio Neo – a versatile workout shoe Dillon – pick from knit, slip-on or leather options, depending on your style Z-Trail EV – if you’re looking for a sandal Common Mistakes When Transitioning to Barefoot Shoes Doing too much too soon Switching every activity at once Starting with running instead of walking Ignoring how your body feels the next day Assuming soreness means something is wrong Build Foot Strength  As you’re adjusting to barefoot shoes, athletes in particular will find foot-strengthening exercises beneficial. What are some of the easiest ways to start building foot strength?  Unlock your foot's strength with basic balance you can do any time.  Try these simple exercises.  Whether you play pickleball or not, this dynamic movement workout is a great place to start. Don't forget to stretch. The transition period isn't just about the shoes; it's about rebuilding foot strength that conventional footwear suppressed. Benefits of Transitioning to Barefoot Shoes The research on barefoot and minimalist footwear continues to grow. Barefoot shoes feel different because they let your feet move differently. With a wider toe box, a flexible sole, and a zero-drop design, they give you a more connected feel underfoot than many traditional shoes. For some people, that feels natural right away. For others, it takes a little time. That’s why the transition matters: you’re giving your body a chance to get used to a new way of moving. 1. Foot Strength Dr. Sara Ridge's research suggests that merely walking in a minimalist shoe for 8 weeks builds foot strength as much as doing a dedicated foot exercise program. 2. Better Ground Feel and Sensory Feedback Your feet have more than 200,000 nerve endings, making them one of the most sensitive areas of your body. That sensory input helps your brain understand where your body is in space (proprioception). With less cushioning underfoot, you can feel more of the ground beneath you. Many people like that connected, responsive feel. 3. More Room for Toes Most shoes taper inward, squeezing your toes together. Barefoot shoes give those toes more room to spread for natural movement with a wider toe box. 4. A Flatter Platform Underfoot Most shoes have an elevated heel, which shifts your center of mass forward. This forces the rest of your body to compensate through your ankles, knees, hips, and back.  Barefoot shoes can keep the body in a neutral alignment and keep the body weight centered over the feet.  Do I Need to Transition to Hiking in Barefoot Shoes? Or can I just go for it? Hiking is often a natural next step after you're comfortable walking in barefoot shoes. In fact, the varied terrain and softer surfaces may feel even better to your feet.  If you’re feeling good just walking around, hit the trails!  Start with a familiar non-technical trail.  Flat or a mellow elevation profile is best, that way you can gauge how your feet and legs feel.  Add time first before distance since trails widely vary based on terrain. If you want to test out for backpacking or longer hikes, bring your regular hiking shoes in your pack and swap into them when your feet feel tired. The bonus is that barefoot hiking shoes feel light and flexible on your feet so they may be a welcome relief when you get to your campsite.  How Can I Transition to Run in Barefoot Shoes? Start even smaller if you want to run in barefoot shoes and aren’t used to minimal cushioning or zero-drop shoes. Proper running form is even more important because barefoot running shoes encourage a forefoot or midfoot strike rather than heel striking.  Start with walking first. Add short running intervals only after casual walking feels comfortable. Keep first runs very short. Don’t change shoes, distance, speed, and terrain all at once. Start on flat, familiar surfaces before trails or hills. You may only start with running 20 or 30 seconds. Your heart and lungs will adapt quickly, but your tendons and connective tissue need more time. Build up gradually and let your body set the pace. Barefoot running shoes offer a great way to feel the ground and  Read these tips to safely transition to running in barefoot shoes. Our goal is that Xero Shoes become your go-to shoes for all-day comfort, wherever the day takes you. The content of this post is for educational and informational purposes only and does not constitute and is not intended to be a substitute for professional medical advice, diagnosis or treatment. Always seek the advice of a physician or other qualified health provider with any questions or concerns you may have about your health or a medical condition.   
Read More How to Transition to Barefoot Shoes
Are Barefoot Shoes Good for Flat Feet or High Arches?

Are Barefoot Shoes Good for Flat Feet or High Arches?

Have you ever thought: “I wish I could wear barefoot shoes, but I can’t. I need support.” Maybe you’ve wanted to try barefoot shoes, but you have flat feet or high arches and you’re worried they won’t give you enough support. It’s great that you’re thinking about how barefoot shoes would affect your overall foot health.   You may have been told that your feet need shoes to support, cushion and control your movement. But here’s another way to look at it: your feet are meant to move. Xero Shoes are built around natural movement: a roomy, foot-shaped toe box, zero-drop sole, flexible low-to-the-ground feel, and lightweight construction. The goal is not to “fix” feet overnight, but to let them bend, flex, and function more like feet. What Are Foot Arches? If you look carefully at a foot, you’ll see it has arch shapes running in more than one direction: front to back and side to side. When people talk about “flat feet” or “high arches,” they’re usually talking about the arch that runs lengthwise along the inside of your foot. This arch is not a rigid bridge. It’s flexible. It changes shape as you stand, walk, run, jump, lift, and move through life. Some people have lower arches. Some people have higher arches.  There’s no single “perfect” foot shape. There’s your foot, your movement, and what feels comfortable and natural for you. Flat Feet vs High Arches Flat feet generally means the inside arch of the foot sits lower to the ground. High arches generally means the inside arch sits higher and leaves less of the midfoot touching the ground. Plenty of people have lower or higher arches and never even notice.  Here’s a simple way to find out: Go outside to your driveway or another dry concrete surface. Wet your feet, then stand on the concrete for a few seconds. When you step away, you’ll see your footprint. Take a picture quickly before it disappears. A fuller footprint may suggest lower arches. A footprint with only a narrow strip connecting the heel and forefoot may suggest higher arches. This is not a diagnosis, but it can be a fun way to notice your foot shape. How Barefoot Shoes Works for Different Arch Types Traditional footwear is built around the idea that feet need support to function well. But that’s not the only way to think about shoes.  Flat feet and high arches are different, but both can be affected by traditional shoes that have a narrow toe box to restrict toe space, lift the heel, or have a stiff, cushioned sole that limits foot motion.  Barefoot shoes are designed to reduce those restrictions. Instead of adding structure that limits motion, it gives your foot more room and freedom inside the shoe. Xero Shoes are designed to reduce those restrictions with: A roomy, foot-shaped toe box so your toes have space to spread A zero-drop sole, meaning your heel and forefoot sit at the same height A flexible sole that lets your foot bend and move A low-to-the-ground feel so you can stay connected to the surface beneath you Lightweight construction that doesn’t make your feet feel boxed in Are Barefoot Shoes Better for Flat Feet or High Arches? Neither arch type is automatically “better” for barefoot shoes. The better question is whether the shoe allows comfortable, natural movement for your foot.  People with flat feet may find a flexible, zero-drop shoe may encourage the foot and lower leg to activate as you walk, train or move through your day. The low-to-the-ground feel can help feel more engaged and connected to the ground. Research suggests that foot strengthening can correct flat feet. If you have high arches, you may appreciate a shoe that does not squeeze your toes or force your foot into a narrow shape. A roomy toe box gives your toes space to spread, while a flexible sole allows your foot to bend and adjust as you move. The big shift is mindset. Instead of asking, “How much support can this shoe give me?” you might ask, “Does this shoe let my foot move comfortably?” For many Xero Shoes fans, that question changes everything. Our design philosophy is simple: let your feet move, bend, flex, and feel.  Key Takeaways Barefoot footwear may be comfortable for some people with flat feet or high arches, but results vary by individual. Look for a roomy toe box, zero-drop sole, flexibility, low-to-the-ground feel, and activity-appropriate traction. Transition gradually to give your feet, calves, and movement patterns time to adapt. Choose barefoot running shoes, hiking shoes, sandals, boots, or training shoes based on the surfaces and conditions you use most. Consult a qualified professional if you have pain, injury history, or medical foot concerns. Frequently Asked Questions Are barefoot shoes good for flat feet? Barefoot shoes may work well for some people with flat feet because they allow more natural foot motion and give the toes room to spread. The best approach is to start gradually and choose a shoe that feels comfortable for your foot and activity. Are barefoot shoes good for high arches? Some people with high arches like barefoot-inspired shoes because they are flexible, lightweight, and roomy in the toe box. A good fit matters most, especially if you are used to narrow or highly structured shoes. Should barefoot shoes have arch support? Traditional arch support is not the focus of barefoot-style design. The idea is to let the foot move and engage naturally, though some people may still need professional guidance or temporary support. What About Orthotics? Some people may want to start wearing orthotics with their barefoot shoes. Pairing orthotics with a flat, zero-drop shoe may work well because it’s a simpler base for the insert. Make sure the fit feels comfortable, your toes still have room, and the orthotic sits properly inside the shoe. If your orthotics were recommended by a professional, check with them before making a big footwear change. Conclusion Barefoot shoes can work for people with flat feet or high arches who want shoes that allow more natural movement. The best results usually come from choosing the right fit, matching the shoe to the activity, and transitioning patiently. Ready to try your own pair of barefoot shoes? Take this quiz to find your perfect pair here. The content of this post is for educational and informational purposes only and does not constitute and is not intended to be a substitute for professional medical advice, diagnosis or treatment. Always seek the advice of a physician or other qualified health provider with any questions or concerns you may have about your health or a medical condition. 
Read More Are Barefoot Shoes Good for Flat Feet or High Arches?
Hiking Boots vs. Hiking Shoes: How to Choose the Right Trail Footwear

Hiking Boots vs. Hiking Shoes: How to Choose the Right Trail Footwear

When you hit the trail, one question comes up again and again: do you lace up hiking boots or hiking shoes? The honest answer is that there’s no single right pick for everyone, but there is a right pick for you, your feet, and the trails you love. At Xero Shoes, we look at this a little differently than most. We believe footwear should protect your feet while letting them function the way they were meant to: bend, flex, feel, and move.  So whether you land on a hiking boot or a hiking shoe, the goal is the same: natural movement, a wide toe box for your toes to splay, and a zero-drop sole that lets you actually feel the ground beneath you. To help break down the differences, we spoke with Michael Pao, Chief Product Officer at Xero Shoes, about what hikers should consider before getting a pair and hitting the trails. Do You Need a Pair of Both? Maybe! It really does come down to personal preference and the kind of hiking you do. If you hike year-round in a range of conditions and encounter cold wet weather, rocky terrain, short day hikes and fast, dusty summer miles, you can benefit from having both a barefoot hiking boot and a lighter trail shoe in your gear closet.  If most of your hikes’ terrain and weather are similar, one well-chosen pair will carry you a long way. The Fundamentals: Core Differences Between Hiking Boots and Hiking Shoes Michael’s Expert Tip: “The biggest difference is protection,” says Michael. “With Xero Shoes hiking styles, the outsole and materials may be similar between a low shoe and a mid boot, but the boot adds more coverage around the ankle and collar.” Hiking Boots Boots rise above the ankle. That extra collar height adds more protection around your ankles from rocks and brush, and more ankle support on loose, uneven terrain. But it can also mean more weight and slightly less ankle mobility. Our waterproof barefoot boots add that coverage, plus a waterproof option, that still provide flexibility and a zero-drop design that lets your feet move naturally. Hiking Shoes A hiking shoe’s collar sits below the ankle, giving your ankle a full range of mobility.  You trade the ankle collar for more natural foot movement from ankle-down. For a lot of hikers, that freedom is the whole point, your feet and ankles get to do their job, getting stronger mile after mile. Materials, Construction & Outsole Both styles start with the same barefoot DNA: a foot-shaped design that’s wide and roomy in the toe box to support natural toe splay,  yet fitted to the midfoot and heel to feel secure. A thin and flexible outsole gives a balance of ground feedback and protection and grippy lugs provide traction. From there: Uppers range from non-waterproof fast-draining, breathable mesh (great for heat and water crossings) to a sealed waterproof membrane (great for rain, mud, and cold temperatures). Outsoles are fine-tuned for trail terrain. Our Scrambler Low EV trail runner uses a Michelin® FiberLite outsole (yes, the same brand as the tire company) that keeps the shoe flexible and lightweight with a trail-ready grip Construction details like a waterproof membrane and gusseted tongue (more on that below) decide how much water and debris stay out. Midfoot lockdown: Xero Shoes’ huarache-inspired tensioning system helps hold the midfoot in place allowing the toe box and forefoot for secure, natural foot movement. Height & Weight Hiking boots come in mid and high cuts, but Xero Shoes focuses more on mid-cuts. More coverage means more materials which means the boots weigh a little more. Low-cut hiking shoes are lighter. The good news: because every pair is built minimalist-first, even our boots stay light and flexible compared to conventional hikers. Michael’s Expert Tip: When choosing between a hiking boot and hiking shoe, Michael says the biggest trade-off is usually weight. A boot has more material, more padding, and a longer tongue, which can add protection, but also adds weight and slightly reduces ankle flexion compared to a low hiking shoe. Xero Shoes’ Scrambler Trail collection has the same materials, waterproofing and outsole construction between the Scrambler Trail Mid WP boot and Scrambler Trail Low WP shoe. The main difference is simply the boot versus shoe.  The Engineering Trade-Off: How Collar Height Affects Performance Here’s the heart of the boots-vs-shoes question. A higher collar adds coverage and support because it shields your ankle from trail debris and keeps more dirt out. The added security and lace hooks on the boot can also give the heel and rear foot a more locked-in feel. A lower collar adds mobility so your ankle moves freely and your foot reacts to the terrain in real time. Neither is “support” in the old-school sense. At Xero Shoes, the real support comes from your feet getting stronger. Here’s how the two stack up: Feature Hiking Boots Hiking Shoes Ankle coverage Above the ankle, more protection from rocks, brush, and rollovers At or below the ankle, full, natural ankle movement Protection More coverage against debris, mud, and trail hazards Lighter coverage; ideal for cleaner trails Weight A bit heavier (membrane + materials) Lighter and more flexible upper Weather range Waterproof for wet and cold conditions Breathable and fast-drying for heat and water crossings Best for Rugged, wet, cold, or overgrown terrain; heavier packs; long mileage Maintained trails, fast day hikes, hot weather, lighter loads Can You Use Trail Running Shoes as Your Hiking Shoes? Absolutely, and our Scrambler Low EV (women’s here) is a perfect fit for anyone who wants one shoe that runs and hikes, or if you prefer a light and agile feel. This lightweight trail runner has an abrasion- and debris-resistant mesh upper, a Michelin® FiberLite outsole, and a barefoot feel that’s right at home on a day hike. A men’s size 9 weighs just 9.2 oz (260.8 g) per shoe, women’s size 7 weighs 7.4oz (210g) per shoe. Prefer something built for the trail but still featherweight? The non-waterproof Mesa Trail II (women’s) is another great crossover and one of our lightest.  Here’s how trail running shoes compare to boots on the details that matter most: Weight: Trail runners are designed with less material around the ankle and are generally lighter. Durability: Boots are a good pick for bushwhacking and rocky terrain, but a rugged trail runner like the Scrambler Low EV handles regular trail abuse with ease.  Breathability: Mesh trail runners breathe and drain far better than a sealed waterproof boot, so your feet stay cooler and dry faster. Choosing Between Hiking Boots and Hiking Shoes The types of hikes you like, and your personal preference, ultimately decide whether you need both shoes and boots in your closet, or just one trusty pair. Run through these five factors and the answer usually gets obvious. Terrain Well-maintained, smooth trails: Hiking shoes give you plenty of protection with more agility. Rugged, rocky, or uneven terrain: Boots add ankle coverage and stability on the chaos underfoot. Overgrown paths or bushwhacking: Boots protect against brush, rocks, and debris far better. Weather Conditions Condition Better Option Why Wet / rainy Waterproof boots Keep water out longer and pair well with gaiters Cold / snowy Waterproof boots or snow boots  Holds warmth better Hot / humid Non-waterproof trail shoes More breathable; dry fast if they get wet Frequent water crossings Non-waterproof trail shoes Drain and dry quickly instead of trapping water inside How Quickly Do You Need Your Footwear to Dry? Have you ever accidentally stepped into a stream or puddle in your non-waterproof shoes? Your feet get wet immediately. Non-waterproof shoes get wet almost immediately, but they also dry fast if the weather is hot, which makes them ideal for summer hikes and repeated water crossings. Waterproof footwear stays dry initially, but if water seeps over the collar into the waterproof membrane, that same membrane that kept water out now keeps it in, and it will take longer to dry. Waterproof Boot or Waterproof Shoe? Watch the Tongue For waterproof styles, the gusseted tongue is the waterline. A gusseted tongue is sewn to the sides of the shoe so water and debris can’t sneak in around it, which means the waterproof membrane only protects you up to that point.  On a low waterproof shoe like the Scrambler Trail Low WP (women's), that line sits lower; step into a creek deeper than the tongue and water pours in. A mid boot like the Scrambler Trail Mid WP (women’s) raises that line, keeping you dry through deeper creeks. Pick your height based on how deep the water typically is. One thing to note: a waterproof membrane traps more heat and breathes less than open mesh. In hot weather, that can mean warmer, sweatier feet, another reason breathable shoes win in summer. If you’re hiking in hot conditions or have only a few potential wet spots, breathable non-waterproof materials allow heat and airflow to help dry the shoe as you move. Michael’s rule of thumb:  If there’s a chance your feet will get wet on a cold day, waterproof is the safer choice. Cold, wet feet can make any hike less enjoyable. Distance Short day hikes (under 5–7 miles): Hiking shoes are often lighter and more comfortable. Long distances or multi-day hikes: Boots offer more coverage and durability for sustained mileage, though many minimalist hikers happily go long in a trail shoe once their feet are conditioned. Does Pack Weight Matter? It does. The more weight you carry, the more your feet appreciate coverage and containment underfoot.  Pack Weight Recommended Footwear Why Light (under 20 lbs) Hiking shoes Plenty of protection; the least weight means the most agility Mid-weight (20–35 lbs) Hiking shoes or a mid-cut boot Extra coverage and ankle containment help as the load shifts Heavy (over 35 lbs) Supportive mid or high boot More coverage, ankle containment, and underfoot protection for the long haul     And don’t forget the weight on your feet. Every ounce you lift with each step adds up over thousands of steps, so wearing a lighter shoe can feel like fresher legs by the end of a long day. Does Your Foot Type Matter? It matters a lot, and it’s where barefoot-style footwear really shines. All of Xero Shoes’ boots and shoes have a wide, foot-shaped toe box, making them a comfortable choice for people with wider feet or bunions, because your toes get to spread out the way nature intended. Flat feet or high arches? Don’t let the “you need support” myth box you in. Here’s why barefoot shoes work for flat feet and high arches. Weak ankles, past injuries, or craving extra stability? A boot’s added coverage may feel reassuring on technical ground. Healthy ankles and a love of natural movement? A low-cut shoe lets your feet move freely. Whichever you choose, dial in the fit first. Our sizing guide takes the guesswork out. How Should Hiking Boots or Shoes Fit? Your hiking footwear should feel secure through the midfoot and heel, with enough room for your toes to move.  The goal is to get a fit that feels secure through the midfoot and heel while giving your toes room to spread. Your foot shouldn’t move around in your boots. Blisters can be a sign of pressure points or too-tight shoes. You can adjust the laces, starting at the bottom and working your way up to the ties to adjust fit. For hiking boots, the upper lacing hooks can also help dial in the fit around the collar and heel. Common Mistakes People Make When Choosing Hiking Footwear Sizing the toe box too small. Your toes should be able to splay, especially on long downhills. If you’ve ever shopped for footwear in-person, you may have been told to use your thumb to measure extra length in the toes. That added space is necessary for traditional footwear with narrow toe boxes because you’re adding room to keep your toes from getting squeezed. With Xero Shoes’ foot-shaped toe box, you may not need as much extra space in front. When in doubt, check the sizing guide. Buying for the hike you wish you did. Match your footwear to the trails you actually hike most, not a once-a-year trail adventure. Assuming waterproof is always better. In heat or minimal water crossings, breathable, fast-drying shoes usually win. Equating “support” with cushioning and stiffness. A rigid sole limits your foot’s ability to bend and flex. More cushioning does not automatically mean a better hike. Thick foam can create a disconnected feel. A lightweight, minimal cushioned shoe feels more connected to the trail, and you may find you’re adapting and moving more agile with that added proprioception.  Going heavier than you need. Think about wearing ankle weights. You’ll notice the weight the longer you wear them. Lighter footwear weighs less, so can feel better over the course of a hike, especially for fast hikers, day hikers, and anyone who prefers a more agile trail feel. Skipping the break-in and fit check. Some people can try on Xero Shoes and immediately hike their regular distances. If you’re new to zero-drop or barefoot shoes, we recommend testing the fit at home, and starting out on short walks before committing to big miles. Find Your Perfect Trail Pair Still deciding? Let your trails, and your feet, lead the way. Take our shoe finder quiz to get matched in minutes, or browse the full hiking boots & shoes collection (men’s · women’s).  Frequently Asked Questions Are hiking boots or hiking shoes better? There’s no “better” style. Boots add ankle coverage, protection, and waterproofing for rugged, wet, or cold terrain and heavier packs. Shoes are lighter, more breathable, and more agile for maintained trails, hot weather, and faster hikes. The best choice depends on your terrain, weather, distance, pack weight, and foot preference. Can I use trail running shoes for hiking?  Yes. A rugged trail runner like the Scrambler Low EV handles day hikes and moderate trails beautifully, with less weight and better breathability than a boot. For wet weather, water crossings, or heavy multi-day loads, a boot may serve you better. Do I need waterproof hiking shoes?  Only sometimes. Waterproof footwear is great for wet weather, but it breathes less and dries slowly once water gets inside. For hot weather and frequent water crossings, non-waterproof shoes that drain and dry fast are usually the smarter pick. Are barefoot hiking boots good for hiking? Yes. Barefoot hiking boots add ankle coverage while keeping a wide toe box, a flexible sole, and a zero-drop platform, so your feet can move naturally and get stronger on the trail. What size hiking shoe should I get? Most people order their regular size, but a foot-shaped toe box should leave room for your toes to spread, especially on descents. Use the Xero Shoes sizing guide to confirm your fit. Are hiking boots or shoes better for flat feet?  Either can work. The bigger win for flat feet or high arches is footwear that lets your foot move and strengthen naturally, rather than locking it in rigid support. The content of this post is for educational and informational purposes only and does not constitute and is not intended to be a substitute for professional medical advice, diagnosis or treatment. Always seek the advice of a physician or other qualified health provider with any questions or concerns you may have about your health or a medical condition. 
Read More Hiking Boots vs. Hiking Shoes: How to Choose the Right Trail Footwear

latest News

The Perfect Summer Shoes to Go with Every Type of Adventure

The Perfect Summer Shoes to Go with Every Type of Adventure

Summer fun is just around the corner. Are you ready for days at the beach? Have you made plans to spend some time on your favorite trails? Or maybe you’re thinking of an urban getaway to a new city? Whatever you’ve got planned, having the right summer shoes to go with your adventures is essential. The right shoes have four key factors: They facilitate your fun. You wouldn’t want to wear a pair of hiking boots to wade in the ocean, and scrambling up a steep mountain trail in a pair of sandals might not be your speed. Pick a shoe that will help you get the most enjoyment from your activity. They leave your feet feeling good. If your feet don’t feel as good at the end of the day as they did at the beginning, then your shoes aren’t doing their job. You like the look of them. They’re easy to pack. Your summer shoes should be light and flexible so they’re easy to take with you anywhere. Whatever adventures the summer has in store for you, Xero Shoes has the right pair of summer shoes to help you maximize your fun. SUMMER SHOES FOR BEACHY FUN - AQUA CLOUD Whether you’re strolling along sandy shores, paddle boarding, or splashing around in the waves, the Aqua Cloud is so lightweight it’s barely there, but — wet or dry — it gives your feet a just-right amount of protection.  Grippy rubber sole No thong strap pressure points Easy on and off lacing 3mm BareFoam for added comfort SHOP AQUA CLOUD CONQUERING AN URBAN JUNGLE - DILLON OR NEXUS KNIT Do you love exploring new cities in the summer months, but dread how your feet feel after walking around on concrete or cobblestones all day? There’s a simple solution. Pick a shoe that leaves your feet feeling as good at the end of the day as they did at the beginning... a shoe like the Dillon or the Nexus Knit.  Soft, breathable mesh upper All day comfort in a classic sneaker Vegan friendly Super lightweight SHOP DILLONSHOP NEXUS KNIT SPENDING SUMMER DAYS ON YOUR FAVORITE TRAILS - SCRAMBLER MID II Enjoy your time in the mountains more when you’re not weighed down by heavy boots. Confidently tackle challenging terrain in the lightweight, flexible Scrambler Mid II. Rainy, muddy trails? The Scrambler Mid II WP, our waterproof version, means you’ll have fun, rain or shine. Grippy Michelin Fiberlite sole Mid height to keep out debris Mud shedding lugs for confident traction Lightweight comfort with the protection you need SHOP SCRAMBLER MID II TAKING ON A SUMMER RUN - HFS II Summertime isn’t just for traveling or hanging out by the lake. It’s also race season. If you’re gearing up for a competitive or fun summer run, don’t forget about your shoes! The HFS II from Xero Shoes may be the perfect road racing shoe. It’s lightweight, highly flexible, and oh-so-comfortable. So lightweight, you’ll feel like you’re flying Tire tread-inspired outsole Moisture-wicking lining for extra breathability Highly flexible sole SHOP HFS II TRAIL RUNNING... YOUR NEW SUMMER HOBBY? - SCRAMBLER LOW Flying down a trail, navigating the uneven terrain, soaking in the outdoors... what could be better? Doing it all in the most comfortable trail runners imaginable, that’s what. See how good your feet feel when you slip into a pair of Scrambler Lows. And if you need your feet to stay dry when the trails getting muddy, there’s a waterproof version, too.   Grippy Michelin Fiberlite sole Breathable mesh upper Lightweight comfort Secure, adjustable fit SHOP SCRAMBLER LOW HAVE MORE FUN WITH HAPPY FEET Whatever adventure you find yourself on, you’ll have more fun when your feet feel good. And that means finding the perfect pair of summer shoes for each of your warm-weather activities. Xero Shoes has barefoot shoes for every summer adventure. Browse all shoes to find your next pair.
Fun Simple Partner Movements

5 “MOVEMENT SNACKS” TO DO WITH A PARTNER

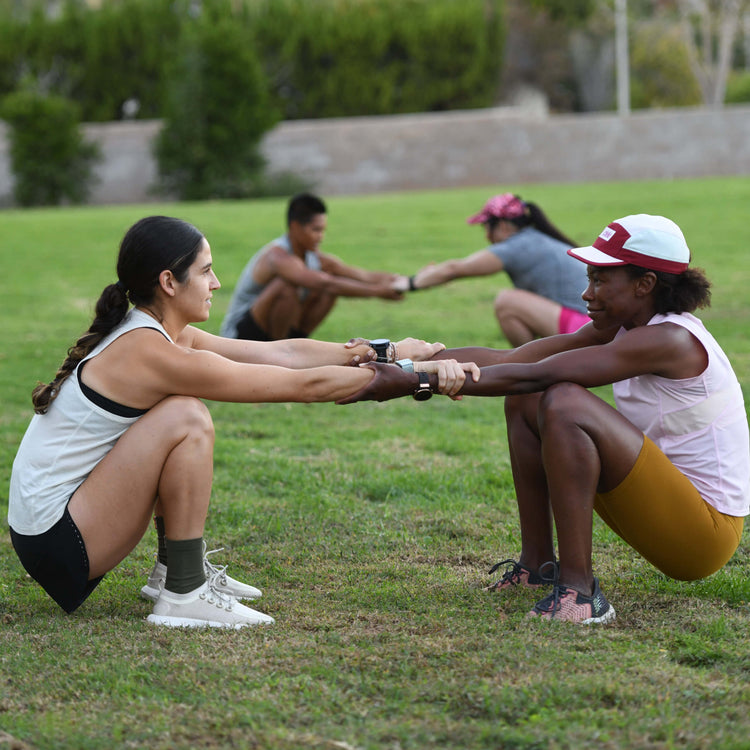
It’s time to rethink what a workout can be! Sure, there’s definitely still a time and place for a dedicated run, yoga class, or lifting session. But the movement in your life doesn’t have to (and shouldn’t) end there.  Fill your life with purposeful, stimulating physicality, and it will pay off in ways you expect, and ways you can’t predict. You’ll perform better, think better, and simply feel better all day!  The perfect place to start is with “movement snacks.”  What are movement snacks?  “Movement snacks” are a groundbreaking training concept from Born to Run 2: The Ultimate Training Guide by Chris McDougall and Eric Orton, the follow-up to McDougall’s iconic best-seller Born to Run.  These easy-to-learn exercises help engrain crucial human movement patterns on both physiological and neurological levels. Borrowing a page from McDougall’s limitless exercise manifesto Natural Born Heroes: Mastering the Lost Secrets of Strength and Endurance, they also require no equipment and can be done anytime, anywhere.  Another great thing about snacks? You can do them on your own, but they’re even better with a partner! Here’s why. For one, adding someone else to your movement practice has been shown in research (and by countless real-life examples) to help all types of workouts be more effective. It helps people stay more motivated to keep coming back. It even enhances exercise's stress-reducing benefits.  Basically, adding another person (or two, or a few) instantly makes everything that makes movement great even better!  Here are three movement snacks that are group-friendly, fun, and suitable for all fitness levels! These exercises are excerpts with permission from Born to Run 2: The Ultimate Training Guide. Get your own signed copy here, and get 10% off of any Xero Shoes purchase! 1. Braced Deep Squat: Solo or With Partner "How to: Face your partner and grab each other's wrists. Support each other by pulling backward, easing down into a squat at the same time.  Pause a few beats, then pull each other back up.  How many: 10-12, with a focus on range of motion and controlled technique, rather than speed.  Pay special attention to: Focus on getting as deep as you can, with good form, keeping feet facing straight forward. Improve through time. Purpose: Deep Squats can unlock your entire range of motion, everything from your neck to the soles of your feet, while loosening tight hips and Achilles and easing lower back tension" 2. Bear Crawls: Solo or With Partner How to: Start on all fours with your hands under your shoulders, knees under hips, and head in a comfortable position, eyes looking at least 1-2 feet ahead of you, ideally straight ahead. Press evenly onto your palms, tuck your toes under and lift your knees to hover just off the floor.  Push onto your left toes and right hand, stepping forward with the left hand and right foot. Continue forward in a nice fluid motion. Keep the hips stable and avoid overly swaying form side to side. Repeat the same opposite arm-opposite leg pattern to move forward. Throughout your movement, keep your focus on easy breathing through the nose. WATCH HOW TO VIDEO How many: 20 steps (each time the right hand makes contact with the ground) to start, and build from there. Pay special attention to: Keeping the knees 2-3 inches off the floor. Work on keeping the hips stable and avoid shifting from side to side. Rest as needed. Purpose: Crawling builds full body strength and connects upper and lower body, as well as developing coordination. It's also a sneaky quad burn!"  A movement snack from "Born To Run 2: The Ultimate Training Guide" Make it a fun partner workout by bear crawling towards each other and then shaking your partner's hand. Then proceed to bear crawl backward and repeat.  3. Side Lift: With Partner "How to: Balance barefoot on your right forefoot using a wall or chair or partner to help you stabilize. Keeping your right leg straight, raise your left leg sideways (think of half a pair of scissors opening). Raise your left leg only as high as ou can while maintaining level hips, and then go back to the start position. Note: This is a stabilizing exercise for the stance leg, not a range-of-motion exercise for the moving leg. How many: 15-25 reps, then repeat with the opposite leg. 4. Knee Lift: With Partner How to: Balance barefoot on your right forefoot using a wall or chair or partner to help you stabilize. Keeping your right leg straight, raise your right heel slightly. Now, lift your knee in front of you as high as you can, and then go back to the start position. Keep your movements slow and controlled. The focus is on the stance leg, not the moving leg. Note: This is a stabilizing exercise for the stance leg, not a range-of-motion exercise for the moving leg. How many: 15-25 reps, then repeat with the opposite leg. 5. Quick Feet: With Partner How to: Facing a partner, raise your hands and place your palms against theirs.  While maintaining palm-to-palm contact, the "lead" partner then tries to quickly step on the other person's toes. The following partner should dance away, doing everything possible to avoid foot contact while keeping palms connected.  Switch How many: Just have fun with it and switch back and forth several times between leaders.  Pay special attention to: Never breaking hand contact. Purpose: This is a fun group warm-up to get the heart rate up and simulate the central nervous system with some multidirectional, quick movement with the feet.
Get Fit and Healthy in 2023 with LivFitKarl's Expert Tips on Natural Movement and Minimalist Footwear

Get Fit and Healthy in 2023 with LivFitKarl's Expert Tips on Natural Movement and Minimalist Footwear

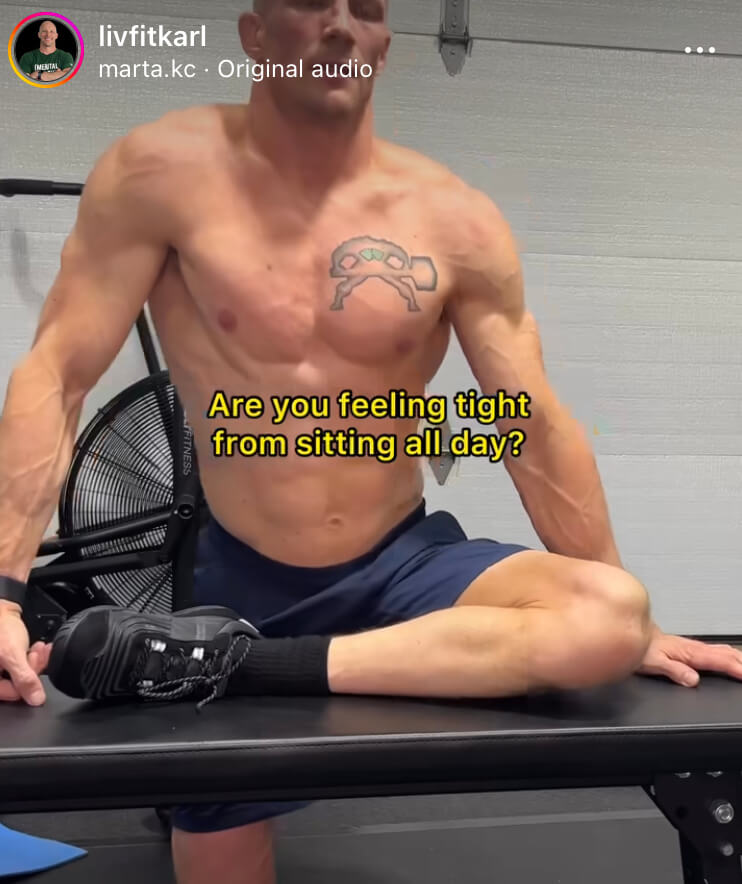
Make your new year's fitness routine even easier with the help of Instagram influencer LivFitKarl, a partner of Xero Shoes. With a focus on natural movement and minimalist footwear, Karl has some great insights on everything from preventing tightness from sitting all day to improving mobility and strength. And as a big fan of Xero Shoes (see here), Karl knows how to walk the walk (literally!) when it comes to staying fit and active. Follow LivFitKarl for some amazing advice on how to live your best, fittest life.
Foot Care for Endurance Athletes

Foot Care for Endurance Athletes

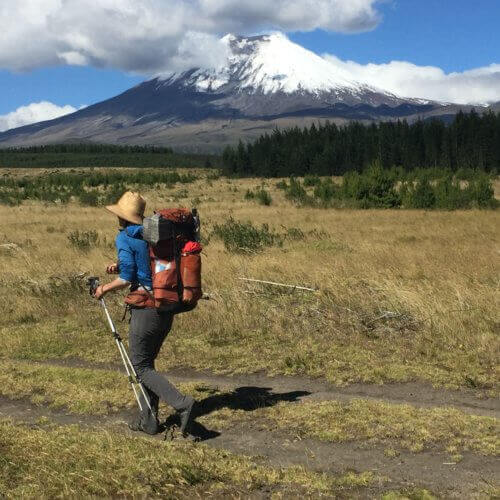
“And forget not that the earth delights to feel your bare feet.” Khalil Gibran Of the 206 bones in your body, 52 are in your feet. Each and every one contributes to getting you to where you are going and is a potential major hindrance if not cared for. As a long distance, long term athlete, I spend a lot of time on my feet. Over the last 7 years I have hiked 12,000 miles, paddled 1,500 miles, and bikepacked 4,000 miles. With 3,500 miles left to complete a non-motorized traverse of the Americas, physical maintenance, and specifically foot care, is crucial. One of the important lessons I’ve learned has been moderation. It sounds silly putting those two thoughts into the same sentence but it is a fundamental truth to how I’ve been able to keep going for so long. Maintaining a pace and stride which works for me, resting when my body needs it, and giving it the resources it needs to stay healthy and moving are all examples of moderation and care which I began learning when I started thru-hiking over a decade ago. And which I continue to learn and relearn when my body makes her demands known or insists in the form of months of illness, repeated bouts of overuse injuries, or other physical break down. Interestingly, these sorts of issues don’t usually spring upon you all at once. There are signs, symptoms. That tweak in your lower back. Is that a one time thing or is that the beginnings of chronic pain? Every endurance athlete knows this fear and the fact is, you never can know which it is going to be. What you can do is incorporate a steady practice of care and strength building to give your body its best chance. Similarly, there are dozens of small things you can do to prevent going down that road, or to aid in recovery as you regain strength and stamina. These are a few of those small practices which can make a big difference Dry Your Feet I spent the first 3 years of my backpacking career battling with trench foot. I came to think it was simply part of the experience. I tried doubling up on socks, traded my way up into Gortex boots and the issue only worsened. When wearing shoes and socks, your feet are experiencing a very different climate than the rest of your body. Usually it is a warm, damp environment, just the sort of place fungus like to grow. I was super glueing deep cracks in my heel shut. Until finally one day I swung in the opposite direction and wore lighter shoes and began airing my feet out more often. I quit sleeping in socks and the issue subsided. If you go barefoot or wear open sandals, your feet will be able to dry naturally. Still, if you are on a multi-day trip, rinse or wipe your feet off at the end of the day, paying special attention to the areas between your toes. Not only will this keep your quilt or sleeping bag cleaner, but it will also keep your foot skin healthier. When you are in a closed shoes sort of environment giving your feet time to air out whenever possible. Whether that is under your desk at work, on a lunch break along the trail, or the drive home from the trailhead, keeping your feet clean and exposed to the open air contributes significantly to your foot health.   Mix it Up Cross-training caught on in the endurance sport world over the past 20 years. All our muscle groups were made to work together so having one set particularly overdeveloped while others languish, doesn’t serve the sustained health of our physical systems in the long run. The same goes for our feet. While thru-hiking the CDT this past summer, I was retraining my feet after several months spent exclusively in my Xero sandals on sandy beaches and in a kayak. Due to constant high mile days, the weight on my back, and the terrain, I opted to hike in trail runners with more padding and zero drop and quickly began to have arch pain. Thus I began alternating between my sandals and trail runners throughout the day. Once the frosty mornings were past and when I took a breakfast break and aired out my feet, I would switch into my sandals for a few hours until lunch. At big river crossings, on smooth trail, and around camp, I was in my sandals. On thorny bushwhacks, across lava rock, and other rough environments, or at the end of the day when I was tired and not able to be as careful with my step, I would switch back into my trail runners. This switching back and forth made me very aware of my gait which is helpful because a hyper-extended gait is a leading cause of shin splints. While the cushion of the trail runners invited this sort of step, my Xeros reminded me not to fall into that. Thus, if like me, you aren’t ready to spend 100% of your time barefoot, there are still many ways and a lot of space for barefoot practices to improve your awareness of how you move, and your experience of both your body and the outdoors.   Thank Your Feet Now, here I may get a bit hoakey for some folks, and I don’t mind if you skip on to the end, but at the end of a long and challenging day, I like to thank my feet. I leave my shoes at the vestibule, peel off my socks, and either soak my feet in a nearby stream or give them a good wipe down with a baby wipe. Then, sitting in the butterfly position or lying on my back in a modified happy baby pose, I wrap my hands around my feet and begin to stretch.  Beginning just above my ankle bone I rub small circles and check in with all those tiny bones. With the texture of my skin. With the cracks in my skin. I thank them for the miles they have put in. Marvel at the ground they have covered and conditions they have weathered. Doing this I work my way all the way down the tops of my feet and then begin again at the ankles and cup my heel. In thru-hiking, that part of the foot takes a lot of heavy strikes and a lot of modern footwear encourages this, so they get an extra thank you for taking that extra whooping. Focusing on the soles of my feet and paying particular attention to both arches, I make my way to the toes. Stretching each toe individually and then tugging outward from the tip, pulling them long and a good final stretch before crawling into my sleeping bag and asking my body to do it all over again tomorrow. Endurance athletes ask a lot of our bodies but every thru-hike, ultra, or even just a junt around the block starts with one small step. The same measured moderation and care applies to foot care. Taking a few minutes out of your day or tacking a few extra on to your training routine may be hard to convince yourself of when you are trying to make miles or balance a busy lifestyle. Whether it is washing and airing out your feet, switching out shoes, or staying awake a few minutes longer in your tent to stretch your soles, small steps can make the biggest difference in the long run. After all, your feet are carrying the most weight on your body, giving them a few minutes of dedicated care is the least you can do. –Adventurer Bethany Hughes   The content of this post does not constitute and is not intended to be a substitute for professional medical advice, diagnosis or treatment. Always seek the advice of a physician or other qualified health provider with any questions or concerns you may have about your health or a medical condition.
Running Form - learning from robots, kids, and ice

Running Form - learning from robots, kids, and ice

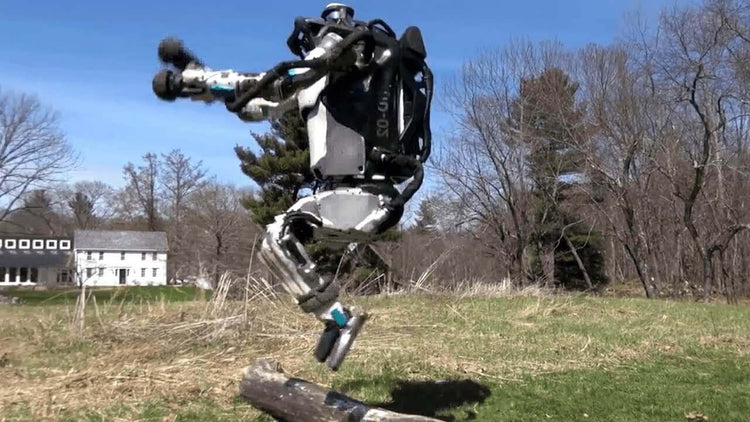
Physics. It's not just a good idea, it's the law.Want to improve your running technique?I have three suggestions: Watch robots run Watch little kids run Learn to run on ice! Running RobotsThe gang at Boston Dynamics are creating robots that do AMAZING things. For one, check out this one:Oh, sure, it's not going to win any races, but what do you notice about its running form?Look at where the foot lands in relation to the body.Is it reaching out in front of the body ("overstriding")? Nope.It's landing, basically, with the foot under the center of mass.This is the most important thing to emulate.You may also notice that this robot contacts the ground with its forefoot first. It doesn't land heel-first. It doesn't land flat footed.Research from Harvard's Dr. Irene Davis suggests that this is the optimal way for humans to land also. Why? Because you're putting the foot and ankle in the optimal position to give you strength, structure, and shock absorption.You know who else runs like this?KIDS!Especially kids who haven't spent much (or any) time in shoes.Take a look at this video. Especially the youngest, littlest kids at the back. Not every stride is perfect (nor should it be... they are, after all, on a non-flat surface), but you'll see that they're landing much like the way the robot does.Forefoot first. Foot under their center of mass.And, perhaps more importantly, it looks like they're having FUN!I also love when the littlest one stops for a few moments because he's "done," then starts again when he's ready to go.Running on Ice!I'm often asked how to run/walk/hike without slipping.Actually, what I'm asked is "Can you make a shoe or sandal that's totally slip resistant?"In short, No.Like I said at the start of this post: Physics is the law.There is no material that can prevent slipping under all conditions.Even the materials that help have limitations and trade-offs. For example, typically, the grippier the sole, the faster it wears out.But you can prevent slipping almost regardless of the sole's composition, or even the surface you're on.How?By doing the same thing that robots and little kids do: Land with your foot UNDER your center of mass (or as close as you can get).One demonstration of this is running on ice.Check out these two videos:In the first video, the runner builds to his full speed on carpet, then holds that speed on ice. In the second, the runner is even able to build speed with proper foot placement.This works because landing with your foot under your body reduces horizontal forces enough to eliminate slipping.A word about slipping in sandalsSometimes people will tell me that their sandal doesn't slip, but their foot slips across the sandal.This is caused by the same issue -- landing with your foot too far away from your body.In that case, the sandal hits the ground and stops while your foot is continuing to move.Landing with your foot under your body, like our kids, robots, and ice-runners, will take care of this, too. Let me know what you discover as you become a child-like robot on ice!  
Flat Feet, High Arches, and Running Barefoot

Flat Feet, High Arches, and Running Barefoot

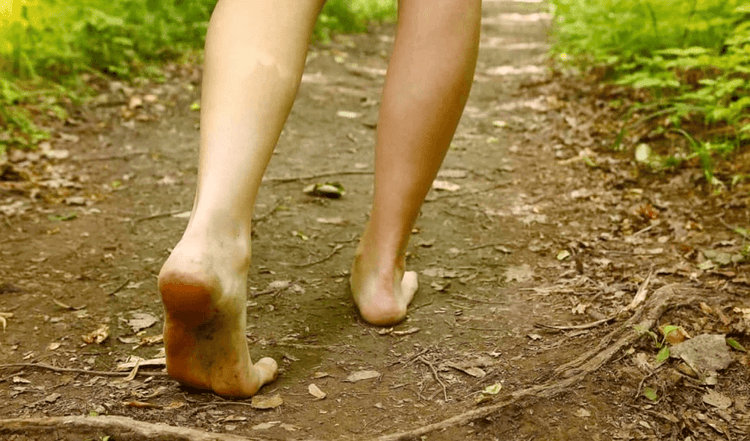
Not infrequently, when the topic of barefoot running comes up, or someone takes a look at my Xero Shoes, whomever I'm speaking with will say:I can't do that. I need support.Oh? I'll respond. Why do you need support?Then something happens that I love. I get one of two seemingly contradictory answers. Either: "I have flat feet!" "I have high arches!" They usually like to add to their proclamation some form of external validation. Like, "I've seen one of the best podiatrists in the world and he agrees that I need orthotics."Oh? He agrees that you need to spend an additional $300-1,000 with him? What a shock.From the perspective of barefoot runners and researchers, high arches and flat feet are not a problem.First of all, the height of your arch is largely genetically determined.Secondly, the problem isn't your arch height, or lack thereof, but whether your arches are STRONG.That is, the "cure" for the problem is not putting your foot in a cast (which is essentially what an orthotic is), it's using it, working on strengthening it.One reason that running in bare feet could help strengthen your feet and arches is that landing with a mid-foot or forefoot strike can actually engage the muscles in your feet.Think about it: When does immobilizing something make it stronger? Never!Personally, I had flat feet my whole life. If I stepped out of a pool, my footprint looked like an oval. After a few months of running and walking barefoot, I started developing arches! I ruined all the family jokes about the flippers I had at the end of my legs.Now, I get out of the water, step on the ground, and you see the outline of a FOOT. Granted, I don't have drive-a-bus-under-them arches but, again, that's genes. All I know is that I haven't used my expensive shoe inserts in years and my feet haven't had problem in all that time.