Court sports are won from the ground up. Whether you play pickleball, tennis, racquetball, or padel, your feet are constantly reading the court, helping you stop, shuffle, pivot, reset, and react.
That’s why we work with pro pickleball trainer and Xero Shoes partner Connor Derrickson to share how he trains players to build better movement from the feet up and what to look for in footwear built for the demands of the court.
Connor wears Xero Shoes extensively on the court, and he’s also trained top pickleball pros, like Anna Bright and Hayden Patriquin, and amateurs alike to move with more control, confidence, and efficiency on the court.
If you’re a pickleball, tennis, racquetball, padel, or other court-sport player who wants to feel more connected to the court and build better footwork from the ground up, read on to learn more.
In This Guide:
Why court sports start at your feet
Barefoot court shoes vs. traditional court shoes
What to look for in a court shoe
Q&A with pickleball trainer Connor Derrickson
How to transition to barefoot court shoes
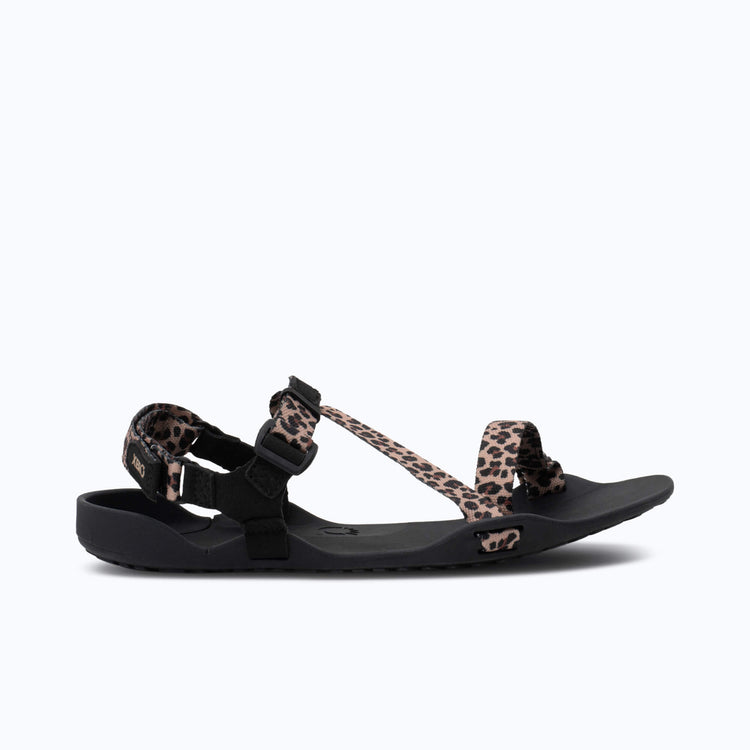
Meet the Xero Shoes 360 Rally
Your Feet Are the Foundation In Court Sports
Court sports aren’t linear. Unlike running or walking, which usually move you forward in one plane, court sports rely on dynamic movement. Sure you’re running on the court, but you’re shuffling side to side, running to the net, stopping quickly, backing up, all which require repeated direction changes.
That constant change of direction starts at your feet. The more connected you are to the court, the more information your body has to work with as you move, reset, and react.
Running shoes are usually built for forward movement and have added cushioning to support repetitive similar movement. A good court shoe should support lateral movement, secure foot placement, grip, and quick ground feedback.
When you can't feel the surface you're on, or how you're contacting it (the angle, the speed, etc.), your muscles, ligaments, tendons, joints, aren't getting the information they need for more responsive movement in time.
Barefoot Court Shoes vs Traditional Court Shoes
Difference
Traditional Court Shoes
Barefoot Court Shoes
Stack Height
Raises the center of gravity and often places more material between you and the court.
Low-to-the-ground design helps you feel more connected to the surface beneath you.
Cushioning
More cushioning creates separation between your foot and the court, which may reduce some ground feedback.
A thin and flexible sole with minimal cushioning helps preserve court feel.
Drop
An elevated heel can subtly shift how your body moves from the ground up.
Zero-drop design keeps your heel and forefoot level, encouraging a more natural stance.
Toe Box
A narrower toe box may limit how much your toes can spread.
A wide, foot-shaped toe box gives your toes room to spread and contribute to balance.
What To Look for in a Court Shoe
Pickleball has been exploding around the globe and footwork is an important part of the sport. Good footwork starts with your shoes. The way you move on the court starts with how your feet connect to the ground.
For court-specific movement:
Heel lockdown and secure midfoot fit to support sharp cuts
Grippy outsole for quick stops and starts
Durable sidewall and toe protection
For barefoot court feel and natural movement:
Low-to-the-ground zero-drop design to stay connected to the court
Wide, foot-shaped toe box to power through your toes
You want a court shoe that’s built for lateral movement, fast reactions, and controlled resets. Traditional shoes can dull sensory feedback. That’s why barefoot fundamentals are another key part to rebuild your connection to the ground.
Xero Shoes 360 Rally was designed specifically for the court, with a tailored fit, heel lockdown, and durable outsole to keep up with the demands on the court.
Q&A with Expert Trainer: Training for Better Court Movement
Connor helped us answer some frequently asked questions about training in barefoot court shoes.
What is the benefit of training in a barefoot court shoe?
The ability to feel the ground is especially important when we’re moving and making cuts. My favorite part of Xero Shoes is the minimal stack height to feel the ground while you play. It feels like the shoe is part of your body, and for the dynamic movement needed in pickleball, that connection is huge.
What do players often misunderstand about cushioning and stability?
I used to think that I needed as much cushion as possible under my feet. The more cushion, the better my joints and back would feel. I was wrong. What I needed to do was actually strengthen my feet and ankles so that I can withstand the demands of pickleball. If players focus on strengthening the lower leg first, then they can have more freedom on the court.
Why does ground feel matter during quick cuts or direction changes?
Your feet are basically your steering wheel, and you can't steer what you can't feel. Every time you split-step, plant, and explode in a new direction, your foot is sending a flood of information up to your brain: like weight distribution, how the court's gripping, whether you're balanced or about to trip and fall. The better that signal is, the faster and more precisely you react. When standing on an inch of foam, that feedback gets muffled, you could end up a half-beat late and a little off-balance. Sometimes, that can cost you a whole point. Ground feel turns your foot into a sensor for all of this information.
What are the most common movement mistakes you see in amateur pickleball players?
First, no split-step. They're flat-footed and stationary when the ball's struck, so they're already late before they move.
Second, they reach instead of step. They plant their feet and lunge their paddle at the ball instead of taking two quick adjustment steps to get behind it, and now they're hitting off-balance with no power.
Third, they cross their feet on lateral movement instead of shuffling, which kills their recovery and leaves the court wide open.
These are the three big ones I see every single time. The theme here is that most amateurs train their hands and completely ignore their feet and footwork. At every level I've coached, from rec players to pros like Anna Bright, footwork is what separates clean shots from scramble shots. Anna always says her goal every match is “no footwork errors”. Meaning no missed shots due to footwork.
What’s one thing you wish every player understood about footwork?
That footwork happens before the ball, not after. Most players think footwork is how you chase a ball down; it's actually how you're already in position when it arrives. Some of the best movers aren't the fastest, they're prepped early. They split-step on time, make fluid movements, and recover to ready position before the next ball comes. If you're constantly lunging and reaching, that's not a speed problem, it's a timing problem. Get your feet set early and the game slows way down. Then you've got time, balance, and options on every shot.
Transitioning to Barefoot Court Shoes
Consistency beats intensity. You don’t need to change everything overnight. Transitioning to barefoot shoes on the court will look different for everyone. Start with short training sessions, practice the fundamentals, and let your body give you feedback.
Court sports are fast and reactive, so give yourself time to build confidence before jumping into long, high-intensity play. Connor developed a court-specific workout plan below, designed to activate from the ground up.
Helpful tips to get started in barefoot court shoes:
Start with the workouts below before going on the court.
Work through phase 1 before progressing to the next phase.
When you feel ready to hit the court, start with training sessions, not full games.
Wear barefoot shoes for short durations first.
Use removable insoles if you want a step-down approach.
Pay attention to how your body responds.
If you experience any tightness in your calves, try a standard stretch by dropping your heels off the edge of a step or curb.
Expert-Recommended “Train to Court” Workout
Once you understand why court movement starts at your feet, the next step is putting that awareness into practice.
Connor created a simple three-phase workout to help players build better foot awareness, lateral control, and quicker court reaction — starting with foundational drills and progressing into more game-like movement.
Connor’s Train to Court workout is broken into three phases:
Regain foot awareness and mobilitySimple balance and mobility drills to reconnect with the ground.
Build court-ready control and powerStrength-based movements that mimic side-to-side court demands.
Improve speed and court reactionFaster drills that help you practice quick transitions, acceleration, and deceleration.
Read next: Connor's Train to Court Workout: 3 Phases for Better Court Movement
Want to take the workout with you on the go? Download the free PDF
Watch the videos for a step-by-step guide. Subscribe to the YouTube Playlist
Meet the 360 Rally
Xero Shoes 360 Rally was designed for players who want the natural movement benefits Xero Shoes are known for, with court-specific features for lateral movement, quick stops, and secure foot placement.
Xero Shoes product team isn’t just made up of footwear experts, they’re pickleball players, too. That’s why they spent a lot of time dialing in a shoe that lets your feet move naturally while staying stable when the pace picks up.
Our Design Director Kristina Funck says, “We spent a lot of time on the internal gusset system that cups your foot to make sure you’re super stable. The 360 Rally gives you stability, power and confidence to be surefooted on the court.
Our Chief Product Officer, Michael Pao says, “We’re taking what our shoe is great at – natural movement and court feel – and enhancing it with our minimal to the max philosophy. Minimal ingredients for maximal performance.”
About the Expert:
Connor Derrickson is a trainer to top pickleball pros like Anna Bright and Hayden Patriquin as well as amateurs, helping players train better footwork, court movement, and body control. As a Xero Shoes partner, Connor has extensively tested the 360 Rally and worked together to develop the workout plan.
Connect with Connor: Instagram | YouTube | LinkedIn
The content of this post is for educational and informational purposes only and does not constitute and is not intended to be a substitute for professional medical advice, diagnosis or treatment. Always seek the advice of a physician or other qualified health provider with any questions or concerns you may have about your health or a medical condition.
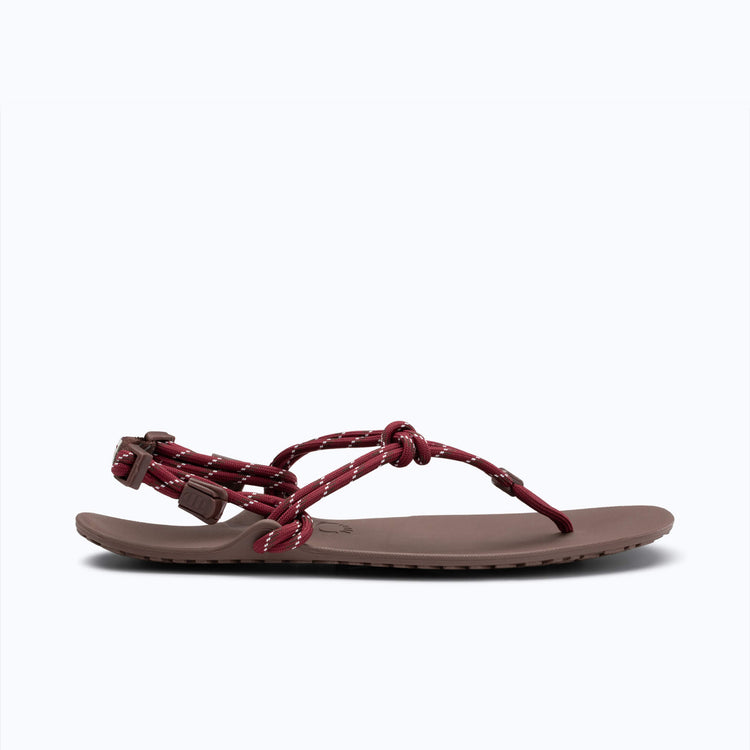
Ever since the publication of Christopher McDougall’s book, Born to Run, there has been an increased interest in the simple sandals worn by the Tarahumara, which he describes in his story.
Called “huaraches,” the footwear of the Tarahumara are basic sandals created from the rubber tread of old tires and a bit of leather cord. Not to be confused with the fancy leather sandals that are also called huaraches, the sandals worn by this people group are the original minimalist running sandals. Members of the tribe are known to run incredible distances over rough terrain and gravel roads with nothing on their feet but these huarache sandals.
Granted, the Tarahumara are not the first or only people to wear similar sandals. In fact, the oldest archeological find of a shoe is many thousands of years old, was found in Fort Rock, Oregon and looks quite familiar.
Now, If you’ve read Born to Run, or otherwise heard about huarache sandals, maybe you’ve been itching to get your hands on a pair of your own minimalist running sandals. There are two ways you can do so.
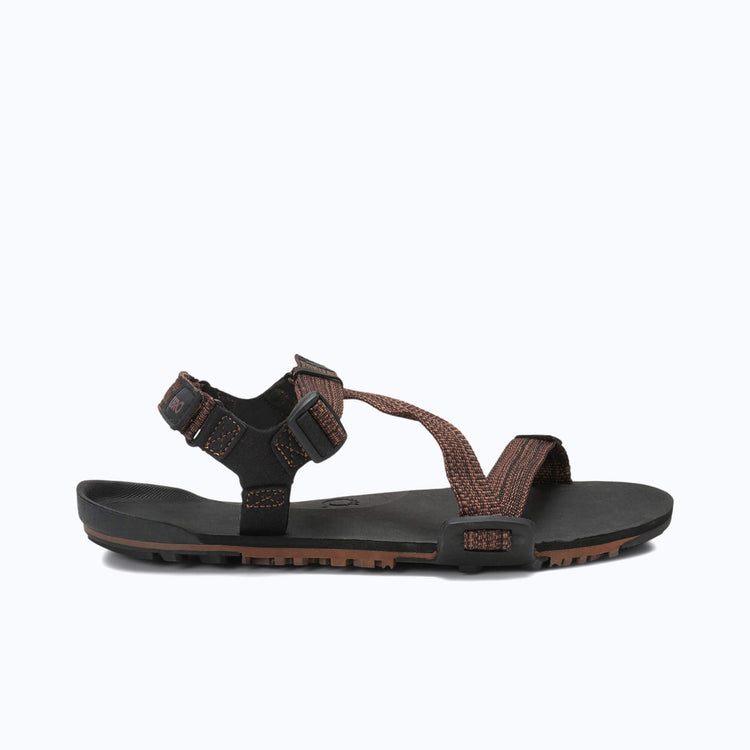
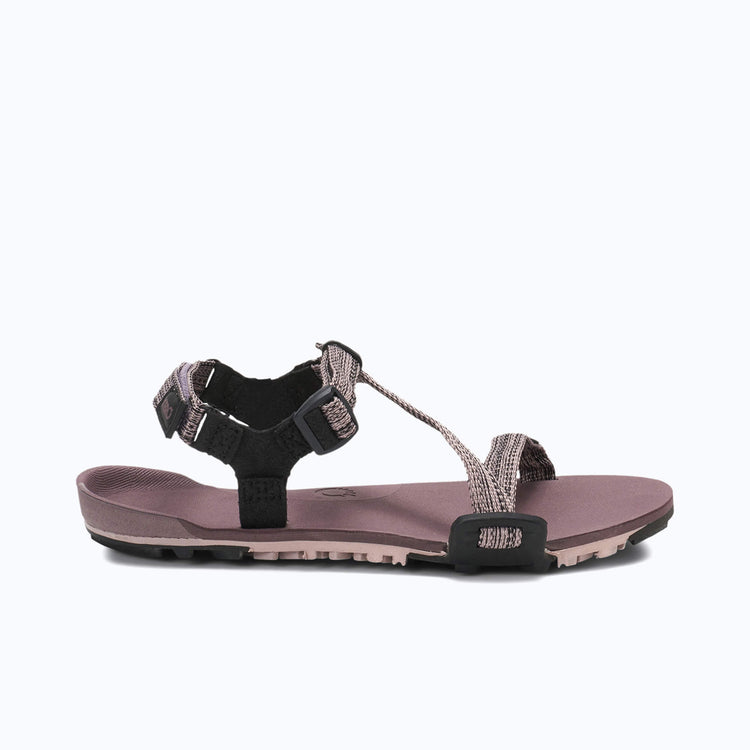
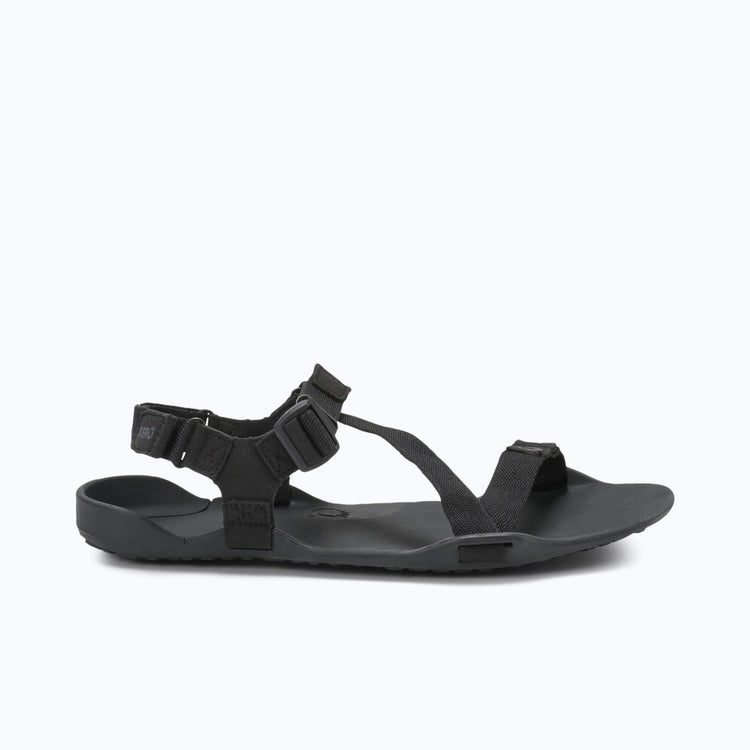
For the less adventuresome, Xero Shoes has created barefoot sandals that recreate the minimalist experience of the original huarache sandals. Find yours here.
For those who are up for the fun of taking on a fun do-it-yourself project, you can make your own sandals.
These instructions will give you the details you need to create your own DIY huarache sandals from scratch using our Xero Shoes Classic Kit with Vibram rubber.
Or you can make some sandals with the only outsole made specifically for barefoot running sandals (yes, you can wear them for other activities than running) – either the 4mm Connect or 6mm Contact kit with FeelTrue™ rubber outsoles. Click here for instructions. (Find out more about our FeelTrue™ products here.)
And, at the end of the instructions about making huaraches, you’ll learn one way to tie huaraches. If you’re adventurous and creative, you can find other tying styles here.
You can also download a PDF of the instructions, below, by clicking here.
Things you’ll need to make huaraches:
Some sort of sole material. Again, we made our FeelTrue rubber to be the best combination of strength, flexibility, and barefoot feel for DIY huaraches sole material. Another good option is the material in our Classic kit, the 4mm Vibram Cherry.
Something to lace the sole to your feet — about 60-72″ per lace (depending on your size). You can use leather lace, hemp cord, etc. We use 5/32″ polyester cord… it’s soft, durable, colorful and provides the right amount of support (too thin can hurt, too thick gets unwieldy).
Piece of paper and a marker (like a Sharpie) — to trace your foot.
Pencil — to transfer your foot template to the sole material.
Strong scissors — to cut your tracing and the sole material.
Leather punch — to make the lacing holes in the sole (NOTE: We do not recommend using a nail or knife to make the hole. Holes made that way tend to tear). You want the holes to be the same size, or slightly smaller, than your cord. We use a 1/8″ punch for our 5/32″ cord (the hole is 1/32″ smaller that the cord). We use this Lace Hole Punch. Note: Depending on the material you use, you could try drilling a hole (some Xero Shoes customers have done this with the Vibram Cherry sole).
Lighter or match — to seal the ends of the lace, if you’re using polyester, nylon, other woven synthetic lace material.
Step-by-step instructions for making Huaraches:
Step 1 – Trace your foot
Step on a piece of paper. Lean forward and put a bit of pressure on your foot so it flattens a tiny bit. Then, using a marker (like a Sharpie) held vertically, trace around your foot. You don’t need to get every tiny nook and cranny, and you’re not trying to get an EXACT measurement of the sole of your foot… in fact, by holding the pen vertically, you’re making a trace that’s slightly bigger than your foot, and that’s exactly what you want.
Step 2 – Even out the tracing
You want to smooth out the curves. For example, you want to make the toe area into a curve, rather than bumps for each toe. Also, I extend the area on the inside of the big toe and the ball of the foot a little bit (sometimes when you run, your foot slips to the inside, so you want to add a bit of extra space here).
Step 3 – Cut out the tracing
Cut around the tracing. That is, cut on the outside of the line you’ve drawn, rather than ON the line. Again, that little extra bit can help make sure the finished product is comfy. Plus, you can always remove material from your huarache sandals and make them smaller, but you can’t make them bigger, so err on the side of too big.
Step 4 – Check your other foot
Take your cut out tracing, flip it over, and step on it with your other foot. If your other foot fits in the cutout, then you’ll use just this one template. If your other foot is significantly different (especially if it’s bigger), repeat steps 1-3 on your other foot. The beauty of making your own huarache sandals is that you can make them to fit your unique feet.
How to make Xero Shoes Barefoot Sandals
Step 5 – Transfer the pattern to the sole material
Place the cutout pattern(s) onto your sole material and trace around it/them with a pencil. If you only have one cutout pattern, remember to flip it over otherwise you’ll end up making 2 soles for the same foot!
Step 6 – Cut out the soles
If you’re using the 4mm Vibram material that comes with the Xero Shoes DIY huarache kit, you can use strong scissors for this. You’ll have to make small cuts towards the back of the scissors and work your way around the material.
Step 7 – Mark the toe hole
Step on your soles and, using a marker (I use the Sharpie from Step 1), put a dot between your first and second toe, right where the webbing between your toes is, and slightly closer to the second toe than right in the middle of the space between the toes.
The reason for this is, when you wear your sandals running, your foot will want to shift toward the inside. By putting the hole closer to the second toe, your foot stays in place better.
NOTE: It’s much easier to have someone else make this and the next 2 marks while you just stand on the soles.
Step 8 – Mark the inside ankle hole
Still standing on the sole, place the pen vertically, just in front of your ankle bone, and make a mark on the sole at that point.
Step 9 – Mark the outside ankle hole
Still standing on the sole, you’ll notice that there’s a place where your foot makes less contact with the ground. Make a mark on the outside edge of the sole at that point.
At this point, you should have marks for three holes.
Step 10 – Punch the holes
The size of the hole you make depends on the material you use for the laces. For example, when I use 3/16″ polypropelene/nylon for the laces, I make a 1/8″ hole. You’ll want to use a leather punch (I use either a rotary leather punch or the Lace Hole Punch we provide with Xero Shoes).
NOTE: I do not recommend using a nail or knife to make the holes. Doing so can often leave a hole that’s not clean, leading to tearing the sole. Punch out the toe hole exactly on the mark you made. For the two ankle holes, punch a hole about 1/4″ in from the edge, in line with the marks you made in steps 8 and 9.
Step 11 – Prepare the laces
Depending on your lace material, you may need to prepare the ends in order to get them through the holes. For example, if you’re using leather, you may want to cut the ends of lace into a point. If you’re using polypropelene/nylon, heat the ends with a flame and carefully (so you don’t burn yourself) seal and shape the ends to be as pointy as possible.
Step 12 – Thread the lace through the toe hole and secure it
Push one end of the lace through the toe hole, from the top to the bottom. A traditional option is to make a knot in the lace, on the bottom side. I typically use a “Figure 8 knot”, pictured here. If you’re using polypropelene/nylon or polyester lace, you’ll want to run the flame from a lighter (or match) under the knot, to melt the nylon slightly, then press the knot together to seal it and flatten it a a bit. Lately, though, I’ve replaced the knot with a lower profile “Lace Bead.”
Click this picture to see a video of Steps 5-13
How to make Xero Shoes Barefoot Sandals
How to make Xero Shoes Barefoot Sandals
Step 13 – Thread the ankle holes
Pass the lace through the outside ankle hole first, from top to bottom. Then pass the lace through the inside ankle hole, also from top to bottom. Follow the pictures to get it correct… you want the lace to “lock in” around the holes.
Click this picture to see a video of how to tie huaraches
How to make Xero Shoes Barefoot Sandals
Step 14 – Put your foot in and tie the huaraches
There are 2 common ways to tie huaraches running sandals. One is the more traditional “toga-style.” And the other (which I learned from “kicksock” on the Google Barefoot Running group) is more stylish and allows you to slip the huarache on and off without retying. There’s no easy way to describe the tying methods, so follow the pictures/videos.
Oh, and you may want to check out these new cool, decorative, and stylish ideas about how to tie huaraches and what to do with “leftover lace.”
The “slip-on” method from a 1st person view:
How to make Xero Shoes Barefoot Sandals
Step 15 – Go out and ENJOY your new huaraches!
Remember, though, to take it easy at first. If you’re not used to going barefoot, especially running barefoot, you’ll be putting more stress on your muscles and skin than you’re used to. Work your way into your huaraches slowly. And if you come up with cool, new tying ideas, put them on our Tying Page.
Quick Questions and Answers
I have found I often get a couple of questions when I’m talking about DIY huarache sandals. Maybe they’re your questions, too.
Can you really run in huaraches?
I get it. We’re used to running in shoes with thick soles and lots of padding. But yes, you can absolutely run in huaraches and I do all the time as do many tens of thousands of Xero Shoes customers.
Remember, these aren’t flip flops. Unlike a casual sandal, huaraches fit snugly and securely to your feet.
It is important to realize, however, that you are going to need to learn to run differently. One of the things Christopher McDougal talks about in his book (which I mentioned at the beginning of this post) is the relationship between footwear and running style.
If you want to know more, I have written a post that tells you everything you need to know about how to run barefoot or in minimalist shoes like huaraches.
I like the idea of minimalist footwear. Is there something with a bit more to protect my foot?
After making your own DIY minimalist sandals, you may wonder if there are more minimalist shoe options out there. Absolutely.
Huraches are associated with the barefoot style of walking or running that emphasizes minimal footwear that allows your feet to move and function naturally. Barefoot sandals, of which huaraches are an example, are just one type of footwear available.
You can also wear barefoot shoes or even a pair of barefoot boots. Xero Shoes has models designed for running as well as walking & hiking. They are perfect for wet or cold weather or any time you just want a bit more coverage or protection.
When I talk about natural movement and the footwear that does, or doesn't, support it, I'm often asked "Where's your proof?"
In fact, if you look at the comments on many of the videos I've made that show how padded, stiff, thick, motion-control, elevated heel shoes with pointy toe boxes don't allow the foot to move naturally, you'll hear from people who agree that each of those characteristics can be bad.
I've even had employees of "Big Shoe" companies concede that their products don't allow the foot to move the way, well, feet are meant to move.
But then when I show how the design of a truly minimalist shoe, like Xero Shoes, can allow for natural movement which can be beneficial, some of those same people think I'm merely spouting an opinion and not synopsizing a LOT of research.
So, if you're one of those people who wants "the proof," I can't think of a better starting point than this paper, published by the American College of Sports Medicine: Stepping Back to Minimal Footwear_Applications Across the Lifespan (clicking the link opens the paper in a new tab).
Read the paper, of course, but if you want to have fun, look at the notes so you can see the amount of research that backs up the paper.
And if you want to have REAL fun, search for and read the papers listed in the notes.
I often call some of that research "The Dumbest Science Ever Done." I'm being deliberately tongue-in-cheek when I use that phrase, but I use it to get people to think about why those of us who promote natural movement need to do serious scientific research to demonstrate something as obvious as "use it or lose it."
We all know that if you DON'T USE your muscles, ligaments, and tendons, you LOSE strength, flexibility, function.
And, equally, we all know that the way you build strength, flexibility, balance, mobility, and agility is by USING your body.
Anyway, enjoy the paper, and leave your thoughts about it in the comments, below...