latest News
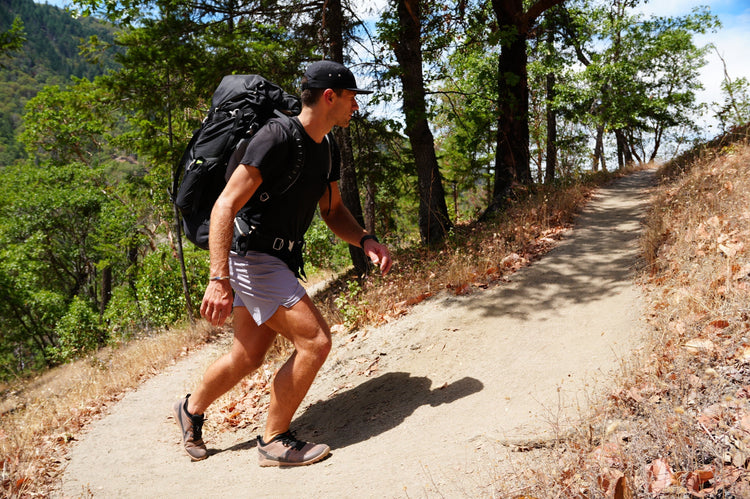
How to Strengthen Your Feet and Ankles for Hiking
You can train your legs, lungs, and core for the mountains and still get sidelined by the one system that actually touches the ground: your feet and ankles. In this guide, NASM-certified personal trainer and Xero Shoes partner Mikey Bell from Outdoor Adventure Training shares why foot and ankle health matters so much to your longevity as a hiker, then walks you through 3 at-home tests and a simple framework for building the ankle mobility, stability, and load capacity that the trail demands. Why Feet and Ankles Matter on the Trail Most of us can get away with weak ankles in daily life. Cushioned shoes, flat, predictable pavement, sidewalks and office floors. There's no stimulus to respond to, no obstacles, and no brain-body connection being built. Each foot has 26 bones, 33 joints, and more than 100 muscles, tendons, and ligaments. All of it has to articulate and stabilize to move over uneven terrain. When those structures are undertrained, the load shifts up the chain to your knees, hips, and lower back. The good news: with the right approach, most of this is trainable. What Changes in Barefoot Trail Shoes Most of us have spent our lives in traditional footwear. Moving toward a barefoot shoe changes a few things at once. You get feedback again. Cushion lifts you off the ground. At the extreme, imagine walking on stilts: you lose proprioception, balance suffers, and you have no sense of what is underneath you. When you switch to a barefoot shoes, your foot is finally feels sensory information again. Your foot gets to be foot-shaped. Toes are meant to spread when you load them, and that splay is a large part of your balance. Most shoes, hiking ones included, taper to a point and squeeze the toes together. Match the shoe to the shape of your foot, not your foot to the shape of the shoe. Your calves are going to work harder. Most street and workout shoes lift the heel, which shortens the calves and Achilles. If you've spent decades in a heel-lifted shoe, this adaptation isn't going to happen overnight. A gradual approach starts with addressing your weak link. Start by Finding Your Weak Link Before changing anything, find out where you stand. These 3 tests take about 15 minutes. Do them barefoot and cold, with no warm-up or rolling first, so you're seeing a true baseline. Log your results. Download and print our free Mountain Ankles Score Sheet before you start. It has the benchmark for each test and scores you at the end, so you'll know which one is your weak link. Follow along. Mikey walks through all 3 tests, start to finish. Test 1: Knee-to-Wall What it measures: ankle mobility. How to: Run a strip of tape out from the base of a wall and mark it at 1-inch intervals out to 6 inches. Half-kneel facing the wall, front foot flat on the tape, back knee down. Drive your front knee forward to touch the wall without your heel lifting. Move your foot back inch by inch. The farthest distance where your knee still touches with the heel grounded is your score. Coach's cue: your knee tracks straight over your 2nd and 3rd toe. Don't let it cave in or flare out. Log: left, right, and the difference. Test 2: Single-Leg Balance What it measures: stability and proprioception. How to: Stand on one foot, hands on hips, eyes open, and time how long you hold it. Then close your eyes, which is where most people find their limit. Run both legs, eyes open and eyes closed. Coach's cue: hands stay on your hips. The control should be coming from your foot and ankle. Log: 4 numbers, left and right, eyes open and eyes closed. Test 3: Single-Leg Heel Raise What it measures: calf capacity and endurance. How to: Stand on one leg. Rest your fingertips on a wall for balance only, and don't push through them. Rise as high as you can onto the ball of your foot, then lower slowly, under control. That's one rep. Go to failure, meaning the point where you can't hit full height with control. Count only clean, full-height reps. Coach's cue: slow and controlled, no bouncing. When your height starts dropping, you're done. Log: left and right. Now tally it up. Your Mountain Ankles Score Sheet turns those numbers into a score and points you at the weak link to work on first. What Builds Healthy Feet and Ankles Order matters. First you learn a new range of motion, then you learn to control that range, and only then do you add load to it. Jumping ahead without a stable foundation is usually where injuries happen. Mobility. Good ankle range of motion is crucial for the trail. It's what lets your knee travel forward over a planted foot on a climb, and what lets the feet and ankles absorb and articulate on the way down. It isn't the fix; it's a gateway that allows for meaningful work to happen. Stability. Stability is control. It's how well you can hold and articulate the ankle through the range you have, and it's what keeps you upright when the ground moves under you. Load capacity. What makes the mobility and stability hold up over a long day. Hiking alone probably isn't going to cut it. This needs to be intentional, focused work. Consistency. None of this works as an occasional big effort. Short and regular beats long and sporadic. The 15-minute version: a full follow-along session to build mountain ankles. Footwear "What shoes should I wear?" is one of the most frequent questions we get from our training community, and the honest answer is that it depends. On your goals, your training history, and what you've had on your feet for most of your life. If you're curious about barefoot shoes, this is a great place to start. Barefoot trail shoes offer real advantages to let feet move naturally, combining ground feel and proprioception. What to look for: Toe room so the foot can splay under load Flexibility so the sole bends with the foot instead of forcing it into one shape Ground feel so you can react to what's underneath you Secure fit with the heel locked and the toes still free Traction that grips on loose dirt and wet rock Enough protection for the terrain you're on. Match the footwear to the adventure Meet the Mesa Summit Speaking of protection, the most common tradeoff with barefoot trail shoes is too little protection: feeling every rock and root underfoot. That’s where Mesa Summit provides protection where it matters and freedom where it counts. A new ESS rock guard, the first from the brand, is embedded in high-impact zones and helps shield feet from rocks and roots without stiffening the ride. The updated abrasion- and debris-resistant polyester mesh upper, reinforced with a 3D-printed overlay, adds durability without compromising flexibility or lightweight comfort. For wet conditions, the Mesa Summit WP retains breathability with waterproof protection. Start from the Ground Up Range you can't load isn't going to hold, and load without range just reinforces a bad position. You need all of it working together. Watch the Mountain Ankles series, run the 3 at-home tests, and start with whichever came back weakest. If you're moving toward a more barefoot-inspired shoe, explore the Mesa Summit as part of a gradual, trail-ready approach. The Mesa Summit combines the protection you need on technical terrain with the natural feel, flexibility, and ground connection that define our barefoot experience. These upgrades improve Xero Shoes’ popular Mesa Trail franchise. About the Expert With over a decade of experience as a NASM-certified personal trainer and professional mountain guide, Mikey blends his fitness expertise with firsthand knowledge from the field. As a Xero Shoes partner, Mikey advocates for barefoot-inspired footwear in the gym and on trail. Connect with Mikey: Website | YouTube | Instagram FAQ What do hikers usually misunderstand about foot and ankle preparation? That hiking is the training. Miles maintain what you have. They don't build what's missing. What are the top 3 movement checks before switching to barefoot trail shoes? Knee-to-wall, single-leg balance drills, and single-leg heel raises. What does ankle mobility actually change on climbs and descents? Climbing and descending both need the knee to travel forward over a planted foot. Without that range, the body will compensate. What's the difference between ankle stability and simply having "good balance"? Balance is a snapshot of one moment. Stability is whether you can control the joint through its range, under load, when the ground moves. What are the most useful exercises for uneven or technical terrain? Single-leg work of almost any kind, banded work, and controlled single-leg landings. How should someone new to barefoot shoes approach their first month? Think of it as the start of a long process rather than a one-month project. Start out with short, flat walks on easy ground, then gradually let volume build from there. How do footwear, training, and consistency work together? Your footwear is how you interact with the ground on every step. But the work that changes things happens when you're out of the shoes: the mobility, the recovery, the loading. Footwear helps the process along. Consistency is what makes it stick. What's one drill you'd give almost every hiker? Single-leg balance. On trail you're on one leg at a time. Getting comfortable there is what sets up every unilateral exercise after it, and that's the foundation of hiking. Stability first, always.
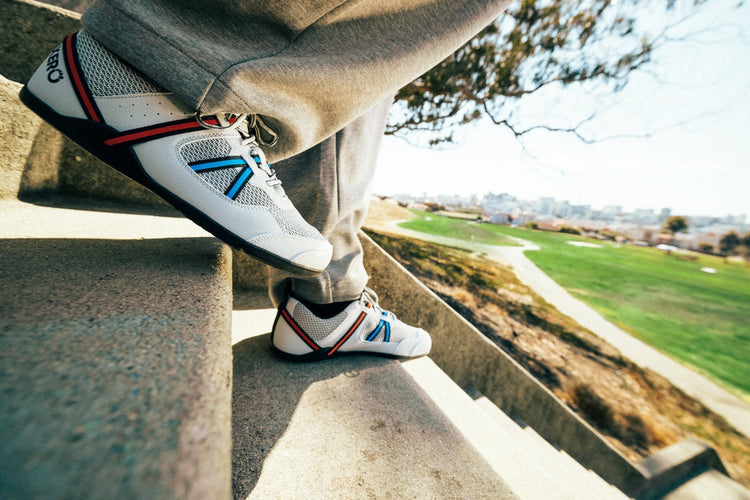
How to Transition to Barefoot Shoes
A lot of people ask us two common questions: aren’t barefoot shoes uncomfortable and don’t I need to transition over time? Barefoot shoes feature a foot-shaped design, thin and flexible zero-drop sole, and minimal cushioning. They’re quite the opposite of traditional footwear. Why Barefoot Shoes Feel Different at First If you’re entirely new to barefoot shoes and come from wearing highly cushioned shoes, it’s definitely a new sensation. It feels different. If you’ve ever been in a cast, the feeling when you take it off awakens the casted muscles because they haven't been used properly. The same goes for wearing barefoot shoes for the first time. You’re using stabilizer muscles and tendons that may not get regular use. When you put less between your feet and the ground, those muscles and tendons start working again as they bend and flex. Would you go to the gym, put 100 pounds on the bar and lift it over and over until you felt so tired you could barely move? Probably not. Give Your Feet Time to Adapt Just as you would gradually increase your weight or volume the more you work out, you should gradually increase the amount of time you spend moving in your barefoot shoes. It’s common to feel a little sore, just like you would when you start a new workout regime. It’s important to know that transitioning to barefoot shoes can be different for everyone. Start small. Build gradually. Let your body adapt. Tips to Transition to Barefoot Shoes Start simple with short walks, quick errands, or everyday activities. Then you can build gradually over time, depending on how you feel. Increase your time in barefoot shoes and you’ll notice your body adapt. A transition period is expected, especially if you’re new to zero-drop and barefoot shoes. If your feet or calves feel a little sore, that’s normal! Pain is not. Most people adjust faster than they expect, especially for walking and everyday wear. If you’ve been wearing cushioned zero-drop shoes, the transition will likely be quicker as well. Start Small Walk around the block, aiming for just 5-10 minutes Do your regular yardwork (if it’s not too muddy/dirty to mess up your new shoes) Wear on your quick trip to the grocery store Wear to the office if you have a desk job Wear while making dinner in the kitchen, where you’re standing and moving around in a small space Build Gradually Add 5 minutes to your walk every week Wear for your walking commute or daily dog walk Start wearing for low-impact strength training workouts like weight lifting Wear for a short, non-technical hike A Simple Barefoot Shoe Transition Plan Week 1: Wear them around the house, for short errands, or for a 5–10 minute walk. Week 2: Add a little more time if your body feels ready. Week 3 and beyond: Try longer walks, casual daily wear, or low-impact workouts. How Do I Know When to Increase Time? Everyone’s transition will be different, because everyone’s feet are different. Start with short, easy sessions and build from there. If something keeps bothering you, scale back and give your body more time. Good signs:Your feet and calves feel fine, or any new sensation fades quickly. If you feel good, add a little more time/activity to your barefoot movement. Slow-down signs: Something feels painful or lingers longer than expected. If you notice lingering soreness, repeat the same amount of time before increasing. If that soreness sticks around, take a lighter day or skip a day. Once that soreness is mild or gone, you can increase. First Barefoot Shoes: Top Picks Prio – a "do it all" sneaker Prio Coast – a hands-free slip-on sneaker Prio Neo – a versatile workout shoe Dillon – pick from knit, slip-on or leather options, depending on your style Z-Trail EV – if you’re looking for a sandal Common Mistakes When Transitioning to Barefoot Shoes Doing too much too soon Switching every activity at once Starting with running instead of walking Ignoring how your body feels the next day Assuming soreness means something is wrong Build Foot Strength As you’re adjusting to barefoot shoes, athletes in particular will find foot-strengthening exercises beneficial. What are some of the easiest ways to start building foot strength? Unlock your foot's strength with basic balance you can do any time. Try these simple exercises. Whether you play pickleball or not, this dynamic movement workout is a great place to start. Don't forget to stretch. The transition period isn't just about the shoes; it's about rebuilding foot strength that conventional footwear suppressed. Benefits of Transitioning to Barefoot Shoes The research on barefoot and minimalist footwear continues to grow. Barefoot shoes feel different because they let your feet move differently. With a wider toe box, a flexible sole, and a zero-drop design, they give you a more connected feel underfoot than many traditional shoes. For some people, that feels natural right away. For others, it takes a little time. That’s why the transition matters: you’re giving your body a chance to get used to a new way of moving. 1. Foot Strength Dr. Sara Ridge's research suggests that merely walking in a minimalist shoe for 8 weeks builds foot strength as much as doing a dedicated foot exercise program. 2. Better Ground Feel and Sensory Feedback Your feet have more than 200,000 nerve endings, making them one of the most sensitive areas of your body. That sensory input helps your brain understand where your body is in space (proprioception). With less cushioning underfoot, you can feel more of the ground beneath you. Many people like that connected, responsive feel. 3. More Room for Toes Most shoes taper inward, squeezing your toes together. Barefoot shoes give those toes more room to spread for natural movement with a wider toe box. 4. A Flatter Platform Underfoot Most shoes have an elevated heel, which shifts your center of mass forward. This forces the rest of your body to compensate through your ankles, knees, hips, and back. Barefoot shoes can keep the body in a neutral alignment and keep the body weight centered over the feet. Do I Need to Transition to Hiking in Barefoot Shoes? Or can I just go for it? Hiking is often a natural next step after you're comfortable walking in barefoot shoes. In fact, the varied terrain and softer surfaces may feel even better to your feet. If you’re feeling good just walking around, hit the trails! Start with a familiar non-technical trail. Flat or a mellow elevation profile is best, that way you can gauge how your feet and legs feel. Add time first before distance since trails widely vary based on terrain. If you want to test out for backpacking or longer hikes, bring your regular hiking shoes in your pack and swap into them when your feet feel tired. The bonus is that barefoot hiking shoes feel light and flexible on your feet so they may be a welcome relief when you get to your campsite. How Can I Transition to Run in Barefoot Shoes? Start even smaller if you want to run in barefoot shoes and aren’t used to minimal cushioning or zero-drop shoes. Proper running form is even more important because barefoot running shoes encourage a forefoot or midfoot strike rather than heel striking. Start with walking first. Add short running intervals only after casual walking feels comfortable. Keep first runs very short. Don’t change shoes, distance, speed, and terrain all at once. Start on flat, familiar surfaces before trails or hills. You may only start with running 20 or 30 seconds. Your heart and lungs will adapt quickly, but your tendons and connective tissue need more time. Build up gradually and let your body set the pace. Barefoot running shoes offer a great way to feel the ground and Read these tips to safely transition to running in barefoot shoes. Our goal is that Xero Shoes become your go-to shoes for all-day comfort, wherever the day takes you. The content of this post is for educational and informational purposes only and does not constitute and is not intended to be a substitute for professional medical advice, diagnosis or treatment. Always seek the advice of a physician or other qualified health provider with any questions or concerns you may have about your health or a medical condition.
Are Barefoot Shoes Good for Flat Feet or High Arches?
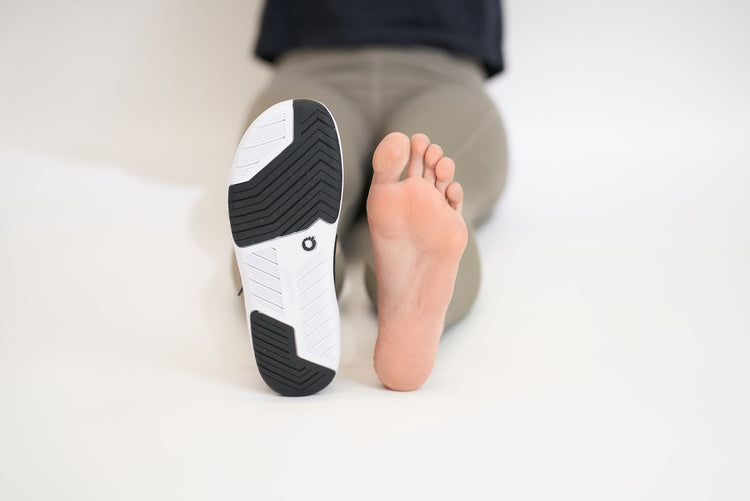
Have you ever thought: “I wish I could wear barefoot shoes, but I can’t. I need support.” Maybe you’ve wanted to try barefoot shoes, but you have flat feet or high arches and you’re worried they won’t give you enough support. It’s great that you’re thinking about how barefoot shoes would affect your overall foot health. You may have been told that your feet need shoes to support, cushion and control your movement. But here’s another way to look at it: your feet are meant to move. Xero Shoes are built around natural movement: a roomy, foot-shaped toe box, zero-drop sole, flexible low-to-the-ground feel, and lightweight construction. The goal is not to “fix” feet overnight, but to let them bend, flex, and function more like feet. What Are Foot Arches? If you look carefully at a foot, you’ll see it has arch shapes running in more than one direction: front to back and side to side. When people talk about “flat feet” or “high arches,” they’re usually talking about the arch that runs lengthwise along the inside of your foot. This arch is not a rigid bridge. It’s flexible. It changes shape as you stand, walk, run, jump, lift, and move through life. Some people have lower arches. Some people have higher arches. There’s no single “perfect” foot shape. There’s your foot, your movement, and what feels comfortable and natural for you. Flat Feet vs High Arches Flat feet generally means the inside arch of the foot sits lower to the ground. High arches generally means the inside arch sits higher and leaves less of the midfoot touching the ground. Plenty of people have lower or higher arches and never even notice. Here’s a simple way to find out: Go outside to your driveway or another dry concrete surface. Wet your feet, then stand on the concrete for a few seconds. When you step away, you’ll see your footprint. Take a picture quickly before it disappears. A fuller footprint may suggest lower arches. A footprint with only a narrow strip connecting the heel and forefoot may suggest higher arches. This is not a diagnosis, but it can be a fun way to notice your foot shape. How Barefoot Shoes Works for Different Arch Types Traditional footwear is built around the idea that feet need support to function well. But that’s not the only way to think about shoes. Flat feet and high arches are different, but both can be affected by traditional shoes that have a narrow toe box to restrict toe space, lift the heel, or have a stiff, cushioned sole that limits foot motion. Barefoot shoes are designed to reduce those restrictions. Instead of adding structure that limits motion, it gives your foot more room and freedom inside the shoe. Xero Shoes are designed to reduce those restrictions with: A roomy, foot-shaped toe box so your toes have space to spread A zero-drop sole, meaning your heel and forefoot sit at the same height A flexible sole that lets your foot bend and move A low-to-the-ground feel so you can stay connected to the surface beneath you Lightweight construction that doesn’t make your feet feel boxed in Are Barefoot Shoes Better for Flat Feet or High Arches? Neither arch type is automatically “better” for barefoot shoes. The better question is whether the shoe allows comfortable, natural movement for your foot. People with flat feet may find a flexible, zero-drop shoe may encourage the foot and lower leg to activate as you walk, train or move through your day. The low-to-the-ground feel can help feel more engaged and connected to the ground. Research suggests that foot strengthening can correct flat feet. If you have high arches, you may appreciate a shoe that does not squeeze your toes or force your foot into a narrow shape. A roomy toe box gives your toes space to spread, while a flexible sole allows your foot to bend and adjust as you move. The big shift is mindset. Instead of asking, “How much support can this shoe give me?” you might ask, “Does this shoe let my foot move comfortably?” For many Xero Shoes fans, that question changes everything. Our design philosophy is simple: let your feet move, bend, flex, and feel. Key Takeaways Barefoot footwear may be comfortable for some people with flat feet or high arches, but results vary by individual. Look for a roomy toe box, zero-drop sole, flexibility, low-to-the-ground feel, and activity-appropriate traction. Transition gradually to give your feet, calves, and movement patterns time to adapt. Choose barefoot running shoes, hiking shoes, sandals, boots, or training shoes based on the surfaces and conditions you use most. Consult a qualified professional if you have pain, injury history, or medical foot concerns. Frequently Asked Questions Are barefoot shoes good for flat feet? Barefoot shoes may work well for some people with flat feet because they allow more natural foot motion and give the toes room to spread. The best approach is to start gradually and choose a shoe that feels comfortable for your foot and activity. Are barefoot shoes good for high arches? Some people with high arches like barefoot-inspired shoes because they are flexible, lightweight, and roomy in the toe box. A good fit matters most, especially if you are used to narrow or highly structured shoes. Should barefoot shoes have arch support? Traditional arch support is not the focus of barefoot-style design. The idea is to let the foot move and engage naturally, though some people may still need professional guidance or temporary support. What About Orthotics? Some people may want to start wearing orthotics with their barefoot shoes. Pairing orthotics with a flat, zero-drop shoe may work well because it’s a simpler base for the insert. Make sure the fit feels comfortable, your toes still have room, and the orthotic sits properly inside the shoe. If your orthotics were recommended by a professional, check with them before making a big footwear change. Conclusion Barefoot shoes can work for people with flat feet or high arches who want shoes that allow more natural movement. The best results usually come from choosing the right fit, matching the shoe to the activity, and transitioning patiently. Ready to try your own pair of barefoot shoes? Take this quiz to find your perfect pair here. The content of this post is for educational and informational purposes only and does not constitute and is not intended to be a substitute for professional medical advice, diagnosis or treatment. Always seek the advice of a physician or other qualified health provider with any questions or concerns you may have about your health or a medical condition.
Hiking Boots vs. Hiking Shoes: How to Choose the Right Trail Footwear
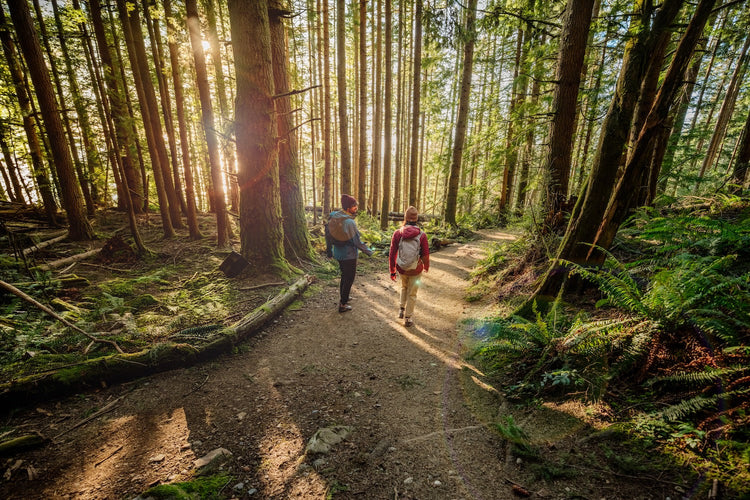
When you hit the trail, one question comes up again and again: do you lace up hiking boots or hiking shoes? The honest answer is that there’s no single right pick for everyone, but there is a right pick for you, your feet, and the trails you love. At Xero Shoes, we look at this a little differently than most. We believe footwear should protect your feet while letting them function the way they were meant to: bend, flex, feel, and move. So whether you land on a hiking boot or a hiking shoe, the goal is the same: natural movement, a wide toe box for your toes to splay, and a zero-drop sole that lets you actually feel the ground beneath you. To help break down the differences, we spoke with Michael Pao, Chief Product Officer at Xero Shoes, about what hikers should consider before getting a pair and hitting the trails. Do You Need a Pair of Both? Maybe! It really does come down to personal preference and the kind of hiking you do. If you hike year-round in a range of conditions and encounter cold wet weather, rocky terrain, short day hikes and fast, dusty summer miles, you can benefit from having both a barefoot hiking boot and a lighter trail shoe in your gear closet. If most of your hikes’ terrain and weather are similar, one well-chosen pair will carry you a long way. The Fundamentals: Core Differences Between Hiking Boots and Hiking Shoes Michael’s Expert Tip: “The biggest difference is protection,” says Michael. “With Xero Shoes hiking styles, the outsole and materials may be similar between a low shoe and a mid boot, but the boot adds more coverage around the ankle and collar.” Hiking Boots Boots rise above the ankle. That extra collar height adds more protection around your ankles from rocks and brush, and more ankle support on loose, uneven terrain. But it can also mean more weight and slightly less ankle mobility. Our waterproof barefoot boots add that coverage, plus a waterproof option, that still provide flexibility and a zero-drop design that lets your feet move naturally. Hiking Shoes A hiking shoe’s collar sits below the ankle, giving your ankle a full range of mobility. You trade the ankle collar for more natural foot movement from ankle-down. For a lot of hikers, that freedom is the whole point, your feet and ankles get to do their job, getting stronger mile after mile. Materials, Construction & Outsole Both styles start with the same barefoot DNA: a foot-shaped design that’s wide and roomy in the toe box to support natural toe splay, yet fitted to the midfoot and heel to feel secure. A thin and flexible outsole gives a balance of ground feedback and protection and grippy lugs provide traction. From there: Uppers range from non-waterproof fast-draining, breathable mesh (great for heat and water crossings) to a sealed waterproof membrane (great for rain, mud, and cold temperatures). Outsoles are fine-tuned for trail terrain. Our Scrambler Low EV trail runner uses a Michelin® FiberLite outsole (yes, the same brand as the tire company) that keeps the shoe flexible and lightweight with a trail-ready grip Construction details like a waterproof membrane and gusseted tongue (more on that below) decide how much water and debris stay out. Midfoot lockdown: Xero Shoes’ huarache-inspired tensioning system helps hold the midfoot in place allowing the toe box and forefoot for secure, natural foot movement. Height & Weight Hiking boots come in mid and high cuts, but Xero Shoes focuses more on mid-cuts. More coverage means more materials which means the boots weigh a little more. Low-cut hiking shoes are lighter. The good news: because every pair is built minimalist-first, even our boots stay light and flexible compared to conventional hikers. Michael’s Expert Tip: When choosing between a hiking boot and hiking shoe, Michael says the biggest trade-off is usually weight. A boot has more material, more padding, and a longer tongue, which can add protection, but also adds weight and slightly reduces ankle flexion compared to a low hiking shoe. Xero Shoes’ Scrambler Trail collection has the same materials, waterproofing and outsole construction between the Scrambler Trail Mid WP boot and Scrambler Trail Low WP shoe. The main difference is simply the boot versus shoe. The Engineering Trade-Off: How Collar Height Affects Performance Here’s the heart of the boots-vs-shoes question. A higher collar adds coverage and support because it shields your ankle from trail debris and keeps more dirt out. The added security and lace hooks on the boot can also give the heel and rear foot a more locked-in feel. A lower collar adds mobility so your ankle moves freely and your foot reacts to the terrain in real time. Neither is “support” in the old-school sense. At Xero Shoes, the real support comes from your feet getting stronger. Here’s how the two stack up: Feature Hiking Boots Hiking Shoes Ankle coverage Above the ankle, more protection from rocks, brush, and rollovers At or below the ankle, full, natural ankle movement Protection More coverage against debris, mud, and trail hazards Lighter coverage; ideal for cleaner trails Weight A bit heavier (membrane + materials) Lighter and more flexible upper Weather range Waterproof for wet and cold conditions Breathable and fast-drying for heat and water crossings Best for Rugged, wet, cold, or overgrown terrain; heavier packs; long mileage Maintained trails, fast day hikes, hot weather, lighter loads Can You Use Trail Running Shoes as Your Hiking Shoes? Absolutely, and our Scrambler Low EV (women’s here) is a perfect fit for anyone who wants one shoe that runs and hikes, or if you prefer a light and agile feel. This lightweight trail runner has an abrasion- and debris-resistant mesh upper, a Michelin® FiberLite outsole, and a barefoot feel that’s right at home on a day hike. A men’s size 9 weighs just 9.2 oz (260.8 g) per shoe, women’s size 7 weighs 7.4oz (210g) per shoe. Prefer something built for the trail but still featherweight? The non-waterproof Mesa Trail II (women’s) is another great crossover and one of our lightest. Here’s how trail running shoes compare to boots on the details that matter most: Weight: Trail runners are designed with less material around the ankle and are generally lighter. Durability: Boots are a good pick for bushwhacking and rocky terrain, but a rugged trail runner like the Scrambler Low EV handles regular trail abuse with ease. Breathability: Mesh trail runners breathe and drain far better than a sealed waterproof boot, so your feet stay cooler and dry faster. Choosing Between Hiking Boots and Hiking Shoes The types of hikes you like, and your personal preference, ultimately decide whether you need both shoes and boots in your closet, or just one trusty pair. Run through these five factors and the answer usually gets obvious. Terrain Well-maintained, smooth trails: Hiking shoes give you plenty of protection with more agility. Rugged, rocky, or uneven terrain: Boots add ankle coverage and stability on the chaos underfoot. Overgrown paths or bushwhacking: Boots protect against brush, rocks, and debris far better. Weather Conditions Condition Better Option Why Wet / rainy Waterproof boots Keep water out longer and pair well with gaiters Cold / snowy Waterproof boots or snow boots Holds warmth better Hot / humid Non-waterproof trail shoes More breathable; dry fast if they get wet Frequent water crossings Non-waterproof trail shoes Drain and dry quickly instead of trapping water inside How Quickly Do You Need Your Footwear to Dry? Have you ever accidentally stepped into a stream or puddle in your non-waterproof shoes? Your feet get wet immediately. Non-waterproof shoes get wet almost immediately, but they also dry fast if the weather is hot, which makes them ideal for summer hikes and repeated water crossings. Waterproof footwear stays dry initially, but if water seeps over the collar into the waterproof membrane, that same membrane that kept water out now keeps it in, and it will take longer to dry. Waterproof Boot or Waterproof Shoe? Watch the Tongue For waterproof styles, the gusseted tongue is the waterline. A gusseted tongue is sewn to the sides of the shoe so water and debris can’t sneak in around it, which means the waterproof membrane only protects you up to that point. On a low waterproof shoe like the Scrambler Trail Low WP (women's), that line sits lower; step into a creek deeper than the tongue and water pours in. A mid boot like the Scrambler Trail Mid WP (women’s) raises that line, keeping you dry through deeper creeks. Pick your height based on how deep the water typically is. One thing to note: a waterproof membrane traps more heat and breathes less than open mesh. In hot weather, that can mean warmer, sweatier feet, another reason breathable shoes win in summer. If you’re hiking in hot conditions or have only a few potential wet spots, breathable non-waterproof materials allow heat and airflow to help dry the shoe as you move. Michael’s rule of thumb: If there’s a chance your feet will get wet on a cold day, waterproof is the safer choice. Cold, wet feet can make any hike less enjoyable. Distance Short day hikes (under 5–7 miles): Hiking shoes are often lighter and more comfortable. Long distances or multi-day hikes: Boots offer more coverage and durability for sustained mileage, though many minimalist hikers happily go long in a trail shoe once their feet are conditioned. Does Pack Weight Matter? It does. The more weight you carry, the more your feet appreciate coverage and containment underfoot. Pack Weight Recommended Footwear Why Light (under 20 lbs) Hiking shoes Plenty of protection; the least weight means the most agility Mid-weight (20–35 lbs) Hiking shoes or a mid-cut boot Extra coverage and ankle containment help as the load shifts Heavy (over 35 lbs) Supportive mid or high boot More coverage, ankle containment, and underfoot protection for the long haul And don’t forget the weight on your feet. Every ounce you lift with each step adds up over thousands of steps, so wearing a lighter shoe can feel like fresher legs by the end of a long day. Does Your Foot Type Matter? It matters a lot, and it’s where barefoot-style footwear really shines. All of Xero Shoes’ boots and shoes have a wide, foot-shaped toe box, making them a comfortable choice for people with wider feet or bunions, because your toes get to spread out the way nature intended. Flat feet or high arches? Don’t let the “you need support” myth box you in. Here’s why barefoot shoes work for flat feet and high arches. Weak ankles, past injuries, or craving extra stability? A boot’s added coverage may feel reassuring on technical ground. Healthy ankles and a love of natural movement? A low-cut shoe lets your feet move freely. Whichever you choose, dial in the fit first. Our sizing guide takes the guesswork out. How Should Hiking Boots or Shoes Fit? Your hiking footwear should feel secure through the midfoot and heel, with enough room for your toes to move. The goal is to get a fit that feels secure through the midfoot and heel while giving your toes room to spread. Your foot shouldn’t move around in your boots. Blisters can be a sign of pressure points or too-tight shoes. You can adjust the laces, starting at the bottom and working your way up to the ties to adjust fit. For hiking boots, the upper lacing hooks can also help dial in the fit around the collar and heel. Common Mistakes People Make When Choosing Hiking Footwear Sizing the toe box too small. Your toes should be able to splay, especially on long downhills. If you’ve ever shopped for footwear in-person, you may have been told to use your thumb to measure extra length in the toes. That added space is necessary for traditional footwear with narrow toe boxes because you’re adding room to keep your toes from getting squeezed. With Xero Shoes’ foot-shaped toe box, you may not need as much extra space in front. When in doubt, check the sizing guide. Buying for the hike you wish you did. Match your footwear to the trails you actually hike most, not a once-a-year trail adventure. Assuming waterproof is always better. In heat or minimal water crossings, breathable, fast-drying shoes usually win. Equating “support” with cushioning and stiffness. A rigid sole limits your foot’s ability to bend and flex. More cushioning does not automatically mean a better hike. Thick foam can create a disconnected feel. A lightweight, minimal cushioned shoe feels more connected to the trail, and you may find you’re adapting and moving more agile with that added proprioception. Going heavier than you need. Think about wearing ankle weights. You’ll notice the weight the longer you wear them. Lighter footwear weighs less, so can feel better over the course of a hike, especially for fast hikers, day hikers, and anyone who prefers a more agile trail feel. Skipping the break-in and fit check. Some people can try on Xero Shoes and immediately hike their regular distances. If you’re new to zero-drop or barefoot shoes, we recommend testing the fit at home, and starting out on short walks before committing to big miles. Find Your Perfect Trail Pair Still deciding? Let your trails, and your feet, lead the way. Take our shoe finder quiz to get matched in minutes, or browse the full hiking boots & shoes collection (men’s · women’s). Frequently Asked Questions Are hiking boots or hiking shoes better? There’s no “better” style. Boots add ankle coverage, protection, and waterproofing for rugged, wet, or cold terrain and heavier packs. Shoes are lighter, more breathable, and more agile for maintained trails, hot weather, and faster hikes. The best choice depends on your terrain, weather, distance, pack weight, and foot preference. Can I use trail running shoes for hiking? Yes. A rugged trail runner like the Scrambler Low EV handles day hikes and moderate trails beautifully, with less weight and better breathability than a boot. For wet weather, water crossings, or heavy multi-day loads, a boot may serve you better. Do I need waterproof hiking shoes? Only sometimes. Waterproof footwear is great for wet weather, but it breathes less and dries slowly once water gets inside. For hot weather and frequent water crossings, non-waterproof shoes that drain and dry fast are usually the smarter pick. Are barefoot hiking boots good for hiking? Yes. Barefoot hiking boots add ankle coverage while keeping a wide toe box, a flexible sole, and a zero-drop platform, so your feet can move naturally and get stronger on the trail. What size hiking shoe should I get? Most people order their regular size, but a foot-shaped toe box should leave room for your toes to spread, especially on descents. Use the Xero Shoes sizing guide to confirm your fit. Are hiking boots or shoes better for flat feet? Either can work. The bigger win for flat feet or high arches is footwear that lets your foot move and strengthen naturally, rather than locking it in rigid support. The content of this post is for educational and informational purposes only and does not constitute and is not intended to be a substitute for professional medical advice, diagnosis or treatment. Always seek the advice of a physician or other qualified health provider with any questions or concerns you may have about your health or a medical condition.
Train From the Ground Up: How Barefoot Court Shoes Support Better Movement
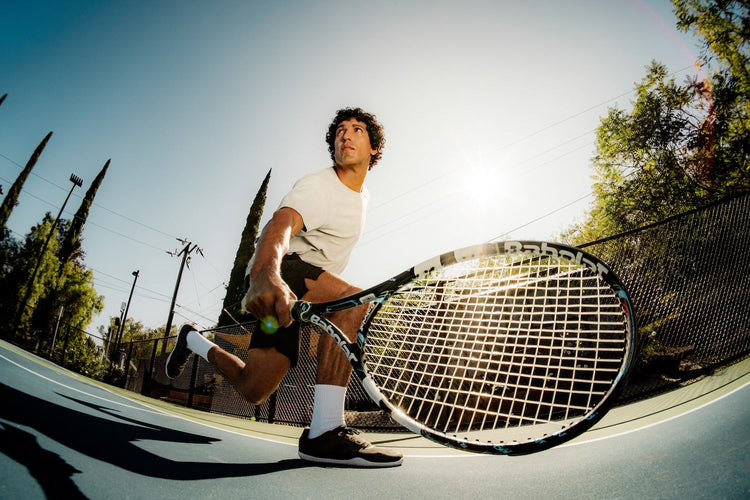
Court sports are won from the ground up. Whether you play pickleball, tennis, racquetball, or padel, your feet are constantly reading the court, helping you stop, shuffle, pivot, reset, and react. That’s why we work with pro pickleball trainer and Xero Shoes partner Connor Derrickson to share how he trains players to build better movement from the feet up and what to look for in footwear built for the demands of the court. Connor wears Xero Shoes extensively on the court, and he’s also trained top pickleball pros, like Anna Bright and Hayden Patriquin, and amateurs alike to move with more control, confidence, and efficiency on the court. If you’re a pickleball, tennis, racquetball, padel, or other court-sport player who wants to feel more connected to the court and build better footwork from the ground up, read on to learn more. In This Guide: Why court sports start at your feet Barefoot court shoes vs. traditional court shoes What to look for in a court shoe Q&A with pickleball trainer Connor Derrickson How to transition to barefoot court shoes Meet the Xero Shoes 360 Rally Your Feet Are the Foundation In Court Sports Court sports aren’t linear. Unlike running or walking, which usually move you forward in one plane, court sports rely on dynamic movement. Sure you’re running on the court, but you’re shuffling side to side, running to the net, stopping quickly, backing up, all which require repeated direction changes. That constant change of direction starts at your feet. The more connected you are to the court, the more information your body has to work with as you move, reset, and react. Running shoes are usually built for forward movement and have added cushioning to support repetitive similar movement. A good court shoe should support lateral movement, secure foot placement, grip, and quick ground feedback. When you can't feel the surface you're on, or how you're contacting it (the angle, the speed, etc.), your muscles, ligaments, tendons, joints, aren't getting the information they need for more responsive movement in time. Barefoot Court Shoes vs Traditional Court Shoes Difference Traditional Court Shoes Barefoot Court Shoes Stack Height Raises the center of gravity and often places more material between you and the court. Low-to-the-ground design helps you feel more connected to the surface beneath you. Cushioning More cushioning creates separation between your foot and the court, which may reduce some ground feedback. A thin and flexible sole with minimal cushioning helps preserve court feel. Drop An elevated heel can subtly shift how your body moves from the ground up. Zero-drop design keeps your heel and forefoot level, encouraging a more natural stance. Toe Box A narrower toe box may limit how much your toes can spread. A wide, foot-shaped toe box gives your toes room to spread and contribute to balance. What To Look for in a Court Shoe Pickleball has been exploding around the globe and footwork is an important part of the sport. Good footwork starts with your shoes. The way you move on the court starts with how your feet connect to the ground. For court-specific movement: Heel lockdown and secure midfoot fit to support sharp cuts Grippy outsole for quick stops and starts Durable sidewall and toe protection For barefoot court feel and natural movement: Low-to-the-ground zero-drop design to stay connected to the court Wide, foot-shaped toe box to power through your toes You want a court shoe that’s built for lateral movement, fast reactions, and controlled resets. Traditional shoes can dull sensory feedback. That’s why barefoot fundamentals are another key part to rebuild your connection to the ground. Xero Shoes 360 Rally was designed specifically for the court, with a tailored fit, heel lockdown, and durable outsole to keep up with the demands on the court. Q&A with Expert Trainer: Training for Better Court Movement Connor helped us answer some frequently asked questions about training in barefoot court shoes. What is the benefit of training in a barefoot court shoe? The ability to feel the ground is especially important when we’re moving and making cuts. My favorite part of Xero Shoes is the minimal stack height to feel the ground while you play. It feels like the shoe is part of your body, and for the dynamic movement needed in pickleball, that connection is huge. What do players often misunderstand about cushioning and stability? I used to think that I needed as much cushion as possible under my feet. The more cushion, the better my joints and back would feel. I was wrong. What I needed to do was actually strengthen my feet and ankles so that I can withstand the demands of pickleball. If players focus on strengthening the lower leg first, then they can have more freedom on the court. Why does ground feel matter during quick cuts or direction changes? Your feet are basically your steering wheel, and you can't steer what you can't feel. Every time you split-step, plant, and explode in a new direction, your foot is sending a flood of information up to your brain: like weight distribution, how the court's gripping, whether you're balanced or about to trip and fall. The better that signal is, the faster and more precisely you react. When standing on an inch of foam, that feedback gets muffled, you could end up a half-beat late and a little off-balance. Sometimes, that can cost you a whole point. Ground feel turns your foot into a sensor for all of this information. What are the most common movement mistakes you see in amateur pickleball players? First, no split-step. They're flat-footed and stationary when the ball's struck, so they're already late before they move. Second, they reach instead of step. They plant their feet and lunge their paddle at the ball instead of taking two quick adjustment steps to get behind it, and now they're hitting off-balance with no power. Third, they cross their feet on lateral movement instead of shuffling, which kills their recovery and leaves the court wide open. These are the three big ones I see every single time. The theme here is that most amateurs train their hands and completely ignore their feet and footwork. At every level I've coached, from rec players to pros like Anna Bright, footwork is what separates clean shots from scramble shots. Anna always says her goal every match is “no footwork errors”. Meaning no missed shots due to footwork. What’s one thing you wish every player understood about footwork? That footwork happens before the ball, not after. Most players think footwork is how you chase a ball down; it's actually how you're already in position when it arrives. Some of the best movers aren't the fastest, they're prepped early. They split-step on time, make fluid movements, and recover to ready position before the next ball comes. If you're constantly lunging and reaching, that's not a speed problem, it's a timing problem. Get your feet set early and the game slows way down. Then you've got time, balance, and options on every shot. Transitioning to Barefoot Court Shoes Consistency beats intensity. You don’t need to change everything overnight. Transitioning to barefoot shoes on the court will look different for everyone. Start with short training sessions, practice the fundamentals, and let your body give you feedback. Court sports are fast and reactive, so give yourself time to build confidence before jumping into long, high-intensity play. Connor developed a court-specific workout plan below, designed to activate from the ground up. Helpful tips to get started in barefoot court shoes: Start with the workouts below before going on the court. Work through phase 1 before progressing to the next phase. When you feel ready to hit the court, start with training sessions, not full games. Wear barefoot shoes for short durations first. Use removable insoles if you want a step-down approach. Pay attention to how your body responds. If you experience any tightness in your calves, try a standard stretch by dropping your heels off the edge of a step or curb. Expert-Recommended “Train to Court” Workout Once you understand why court movement starts at your feet, the next step is putting that awareness into practice. Connor created a simple three-phase workout to help players build better foot awareness, lateral control, and quicker court reaction — starting with foundational drills and progressing into more game-like movement. Connor’s Train to Court workout is broken into three phases: Regain foot awareness and mobilitySimple balance and mobility drills to reconnect with the ground. Build court-ready control and powerStrength-based movements that mimic side-to-side court demands. Improve speed and court reactionFaster drills that help you practice quick transitions, acceleration, and deceleration. Read next: Connor's Train to Court Workout: 3 Phases for Better Court Movement Want to take the workout with you on the go? Download the free PDF Watch the videos for a step-by-step guide. Subscribe to the YouTube Playlist Meet the 360 Rally Xero Shoes 360 Rally was designed for players who want the natural movement benefits Xero Shoes are known for, with court-specific features for lateral movement, quick stops, and secure foot placement. Xero Shoes product team isn’t just made up of footwear experts, they’re pickleball players, too. That’s why they spent a lot of time dialing in a shoe that lets your feet move naturally while staying stable when the pace picks up. Our Design Director Kristina Funck says, “We spent a lot of time on the internal gusset system that cups your foot to make sure you’re super stable. The 360 Rally gives you stability, power and confidence to be surefooted on the court. Our Chief Product Officer, Michael Pao says, “We’re taking what our shoe is great at – natural movement and court feel – and enhancing it with our minimal to the max philosophy. Minimal ingredients for maximal performance.” About the Expert: Connor Derrickson is a trainer to top pickleball pros like Anna Bright and Hayden Patriquin as well as amateurs, helping players train better footwork, court movement, and body control. As a Xero Shoes partner, Connor has extensively tested the 360 Rally and worked together to develop the workout plan. Connect with Connor: Instagram | YouTube | LinkedIn The content of this post is for educational and informational purposes only and does not constitute and is not intended to be a substitute for professional medical advice, diagnosis or treatment. Always seek the advice of a physician or other qualified health provider with any questions or concerns you may have about your health or a medical condition.
How to Make Huaraches
Ever since the publication of Christopher McDougall’s book, Born to Run, there has been an increased interest in the simple sandals worn by the Tarahumara, which he describes in his story. Called “huaraches,” the footwear of the Tarahumara are basic sandals created from the rubber tread of old tires and a bit of leather cord. Not to be confused with the fancy leather sandals that are also called huaraches, the sandals worn by this people group are the original minimalist running sandals. Members of the tribe are known to run incredible distances over rough terrain and gravel roads with nothing on their feet but these huarache sandals. Granted, the Tarahumara are not the first or only people to wear similar sandals. In fact, the oldest archeological find of a shoe is many thousands of years old, was found in Fort Rock, Oregon and looks quite familiar. Now, If you’ve read Born to Run, or otherwise heard about huarache sandals, maybe you’ve been itching to get your hands on a pair of your own minimalist running sandals. There are two ways you can do so. For the less adventuresome, Xero Shoes has created barefoot sandals that recreate the minimalist experience of the original huarache sandals. Find yours here. For those who are up for the fun of taking on a fun do-it-yourself project, you can make your own sandals. These instructions will give you the details you need to create your own DIY huarache sandals from scratch using our Xero Shoes Classic Kit with Vibram rubber. Or you can make some sandals with the only outsole made specifically for barefoot running sandals (yes, you can wear them for other activities than running) – either the 4mm Connect or 6mm Contact kit with FeelTrue™ rubber outsoles. Click here for instructions. (Find out more about our FeelTrue™ products here.) And, at the end of the instructions about making huaraches, you’ll learn one way to tie huaraches. If you’re adventurous and creative, you can find other tying styles here. You can also download a PDF of the instructions, below, by clicking here. Things you’ll need to make huaraches: Some sort of sole material. Again, we made our FeelTrue rubber to be the best combination of strength, flexibility, and barefoot feel for DIY huaraches sole material. Another good option is the material in our Classic kit, the 4mm Vibram Cherry. Something to lace the sole to your feet — about 60-72″ per lace (depending on your size). You can use leather lace, hemp cord, etc. We use 5/32″ polyester cord… it’s soft, durable, colorful and provides the right amount of support (too thin can hurt, too thick gets unwieldy). Piece of paper and a marker (like a Sharpie) — to trace your foot. Pencil — to transfer your foot template to the sole material. Strong scissors — to cut your tracing and the sole material. Leather punch — to make the lacing holes in the sole (NOTE: We do not recommend using a nail or knife to make the hole. Holes made that way tend to tear). You want the holes to be the same size, or slightly smaller, than your cord. We use a 1/8″ punch for our 5/32″ cord (the hole is 1/32″ smaller that the cord). We use this Lace Hole Punch. Note: Depending on the material you use, you could try drilling a hole (some Xero Shoes customers have done this with the Vibram Cherry sole). Lighter or match — to seal the ends of the lace, if you’re using polyester, nylon, other woven synthetic lace material. Step-by-step instructions for making Huaraches: Step 1 – Trace your foot Step on a piece of paper. Lean forward and put a bit of pressure on your foot so it flattens a tiny bit. Then, using a marker (like a Sharpie) held vertically, trace around your foot. You don’t need to get every tiny nook and cranny, and you’re not trying to get an EXACT measurement of the sole of your foot… in fact, by holding the pen vertically, you’re making a trace that’s slightly bigger than your foot, and that’s exactly what you want. Step 2 – Even out the tracing You want to smooth out the curves. For example, you want to make the toe area into a curve, rather than bumps for each toe. Also, I extend the area on the inside of the big toe and the ball of the foot a little bit (sometimes when you run, your foot slips to the inside, so you want to add a bit of extra space here). Step 3 – Cut out the tracing Cut around the tracing. That is, cut on the outside of the line you’ve drawn, rather than ON the line. Again, that little extra bit can help make sure the finished product is comfy. Plus, you can always remove material from your huarache sandals and make them smaller, but you can’t make them bigger, so err on the side of too big. Step 4 – Check your other foot Take your cut out tracing, flip it over, and step on it with your other foot. If your other foot fits in the cutout, then you’ll use just this one template. If your other foot is significantly different (especially if it’s bigger), repeat steps 1-3 on your other foot. The beauty of making your own huarache sandals is that you can make them to fit your unique feet. How to make Xero Shoes Barefoot Sandals Step 5 – Transfer the pattern to the sole material Place the cutout pattern(s) onto your sole material and trace around it/them with a pencil. If you only have one cutout pattern, remember to flip it over otherwise you’ll end up making 2 soles for the same foot! Step 6 – Cut out the soles If you’re using the 4mm Vibram material that comes with the Xero Shoes DIY huarache kit, you can use strong scissors for this. You’ll have to make small cuts towards the back of the scissors and work your way around the material. Step 7 – Mark the toe hole Step on your soles and, using a marker (I use the Sharpie from Step 1), put a dot between your first and second toe, right where the webbing between your toes is, and slightly closer to the second toe than right in the middle of the space between the toes. The reason for this is, when you wear your sandals running, your foot will want to shift toward the inside. By putting the hole closer to the second toe, your foot stays in place better. NOTE: It’s much easier to have someone else make this and the next 2 marks while you just stand on the soles. Step 8 – Mark the inside ankle hole Still standing on the sole, place the pen vertically, just in front of your ankle bone, and make a mark on the sole at that point. Step 9 – Mark the outside ankle hole Still standing on the sole, you’ll notice that there’s a place where your foot makes less contact with the ground. Make a mark on the outside edge of the sole at that point. At this point, you should have marks for three holes. Step 10 – Punch the holes The size of the hole you make depends on the material you use for the laces. For example, when I use 3/16″ polypropelene/nylon for the laces, I make a 1/8″ hole. You’ll want to use a leather punch (I use either a rotary leather punch or the Lace Hole Punch we provide with Xero Shoes). NOTE: I do not recommend using a nail or knife to make the holes. Doing so can often leave a hole that’s not clean, leading to tearing the sole. Punch out the toe hole exactly on the mark you made. For the two ankle holes, punch a hole about 1/4″ in from the edge, in line with the marks you made in steps 8 and 9. Step 11 – Prepare the laces Depending on your lace material, you may need to prepare the ends in order to get them through the holes. For example, if you’re using leather, you may want to cut the ends of lace into a point. If you’re using polypropelene/nylon, heat the ends with a flame and carefully (so you don’t burn yourself) seal and shape the ends to be as pointy as possible. Step 12 – Thread the lace through the toe hole and secure it Push one end of the lace through the toe hole, from the top to the bottom. A traditional option is to make a knot in the lace, on the bottom side. I typically use a “Figure 8 knot”, pictured here. If you’re using polypropelene/nylon or polyester lace, you’ll want to run the flame from a lighter (or match) under the knot, to melt the nylon slightly, then press the knot together to seal it and flatten it a a bit. Lately, though, I’ve replaced the knot with a lower profile “Lace Bead.” Click this picture to see a video of Steps 5-13 How to make Xero Shoes Barefoot Sandals How to make Xero Shoes Barefoot Sandals Step 13 – Thread the ankle holes Pass the lace through the outside ankle hole first, from top to bottom. Then pass the lace through the inside ankle hole, also from top to bottom. Follow the pictures to get it correct… you want the lace to “lock in” around the holes. Click this picture to see a video of how to tie huaraches How to make Xero Shoes Barefoot Sandals Step 14 – Put your foot in and tie the huaraches There are 2 common ways to tie huaraches running sandals. One is the more traditional “toga-style.” And the other (which I learned from “kicksock” on the Google Barefoot Running group) is more stylish and allows you to slip the huarache on and off without retying. There’s no easy way to describe the tying methods, so follow the pictures/videos. Oh, and you may want to check out these new cool, decorative, and stylish ideas about how to tie huaraches and what to do with “leftover lace.” The “slip-on” method from a 1st person view: How to make Xero Shoes Barefoot Sandals Step 15 – Go out and ENJOY your new huaraches! Remember, though, to take it easy at first. If you’re not used to going barefoot, especially running barefoot, you’ll be putting more stress on your muscles and skin than you’re used to. Work your way into your huaraches slowly. And if you come up with cool, new tying ideas, put them on our Tying Page. Quick Questions and Answers I have found I often get a couple of questions when I’m talking about DIY huarache sandals. Maybe they’re your questions, too. Can you really run in huaraches? I get it. We’re used to running in shoes with thick soles and lots of padding. But yes, you can absolutely run in huaraches and I do all the time as do many tens of thousands of Xero Shoes customers. Remember, these aren’t flip flops. Unlike a casual sandal, huaraches fit snugly and securely to your feet. It is important to realize, however, that you are going to need to learn to run differently. One of the things Christopher McDougal talks about in his book (which I mentioned at the beginning of this post) is the relationship between footwear and running style. If you want to know more, I have written a post that tells you everything you need to know about how to run barefoot or in minimalist shoes like huaraches. I like the idea of minimalist footwear. Is there something with a bit more to protect my foot? After making your own DIY minimalist sandals, you may wonder if there are more minimalist shoe options out there. Absolutely. Huraches are associated with the barefoot style of walking or running that emphasizes minimal footwear that allows your feet to move and function naturally. Barefoot sandals, of which huaraches are an example, are just one type of footwear available. You can also wear barefoot shoes or even a pair of barefoot boots. Xero Shoes has models designed for running as well as walking & hiking. They are perfect for wet or cold weather or any time you just want a bit more coverage or protection.
Unlock Your Foot Core
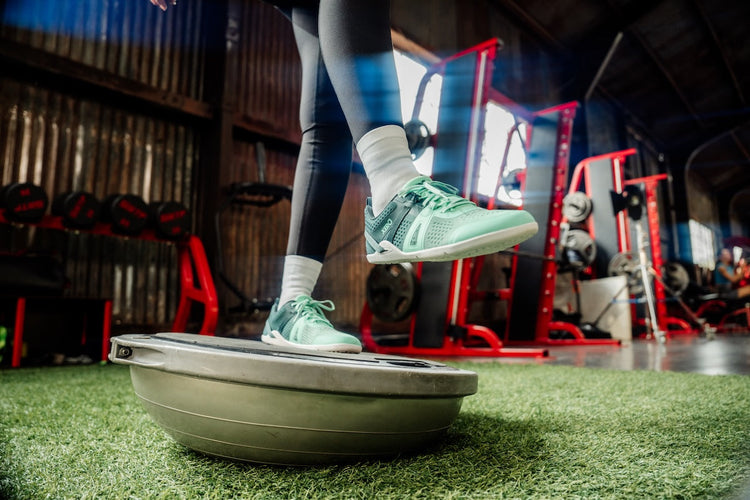
You’ve probably heard of (or tried) doing planks for time as a way to test your core strength and stability. But did you know that your feet have a "core"? You can actually train your foot core to help prevent running-related injuries according to a study by Dr. Sacco. In the book Born to Run 2: The Ultimate Training Guide, authors Christopher McDougall and Eric Orton place a high priority on what they call “foot core” training. Here’s how you can test your "foot core" strength. ONE-LEGGED BAREFOOT BALANCE TEST Balance on one foot, on your forefoot, on a hard surface with the heel a little elevated so you feel nice and strong at the arch. Use a wall or chair or partner to help you stabilize when needed. Note: This isn’t a calf raise exercise, with up and down movement with the foot. There’s no movement, just stabilizing. Do this for 30–90 seconds per foot, or until you fatigue. It seems simple, balancing on one foot. But that's the key to getting the stabilizer muscles and tendons in your feet activated. What are some other ways to unlock your foot's natural strength? Wear Xero Shoes Walking in minimalist shoes, like Xero Shoes, could be effective for strengthening foot muscles according to Dr. Ridge’s research showing how walking in minimalist shoes built foot strength as much as doing an 8-week foot strengthening exercise program. Add a challenge Mastered the standard one-legged balance? Now try to balance while closing your eyes. Or stand on a log, yoga block, or any other raised surface. Keep practicing One-legged balancing is both a test and a zero-impact exercise that you can do pretty much every day. Long video meeting? Stand up, adjust your camera and balance on one foot. No one will even notice. Time yourself and see if you can beat your previous record.

Minimalist and Barefoot Shoes - a scientific overview
When I talk about natural movement and the footwear that does, or doesn't, support it, I'm often asked "Where's your proof?" In fact, if you look at the comments on many of the videos I've made that show how padded, stiff, thick, motion-control, elevated heel shoes with pointy toe boxes don't allow the foot to move naturally, you'll hear from people who agree that each of those characteristics can be bad. I've even had employees of "Big Shoe" companies concede that their products don't allow the foot to move the way, well, feet are meant to move. But then when I show how the design of a truly minimalist shoe, like Xero Shoes, can allow for natural movement which can be beneficial, some of those same people think I'm merely spouting an opinion and not synopsizing a LOT of research. So, if you're one of those people who wants "the proof," I can't think of a better starting point than this paper, published by the American College of Sports Medicine: Stepping Back to Minimal Footwear_Applications Across the Lifespan (clicking the link opens the paper in a new tab). Read the paper, of course, but if you want to have fun, look at the notes so you can see the amount of research that backs up the paper. And if you want to have REAL fun, search for and read the papers listed in the notes. I often call some of that research "The Dumbest Science Ever Done." I'm being deliberately tongue-in-cheek when I use that phrase, but I use it to get people to think about why those of us who promote natural movement need to do serious scientific research to demonstrate something as obvious as "use it or lose it." We all know that if you DON'T USE your muscles, ligaments, and tendons, you LOSE strength, flexibility, function. And, equally, we all know that the way you build strength, flexibility, balance, mobility, and agility is by USING your body. Anyway, enjoy the paper, and leave your thoughts about it in the comments, below...

Barefoot Shoes for Weightlifting & Strength Training
Think about the last time you went to the gym. You probably planned your outfit. But when was the last time you thought about your shoes? Unless you're a competitive lifter, chances are you just grabbed whatever sneakers you had — the same pair you run in, walk the dog, even run errands. And if that’s the case? You might be leaving strength gains on the floor. Why Do Some Weightlifters Workout Barefoot? When you deadlift, swing a kettlebell, or press a barbell overhead, what’s the first thing you feel your body do? Your feet push down into the ground. That downward force is your foundation. And if your foundation is unstable, your lift is compromised. To create real stability, your feet need three things: A wide base (toes able to spread naturally) Ground feedback (so your brain knows what your feet are doing) Active muscular control (which begins with that sensory feedback) Think about walking on stilts. Or walking with two pillows strapped to your feet. It’s awkward, right? The higher and softer the platform, the less stable you feel. That’s what happens with thick, cushioned shoes. Foam compresses and traditional shoes that have added cushion in the heels (added heel drop) shift your weight forward. Narrow toe boxes squeeze your base. And the padding absorbs force you’re trying to send into the ground. If strength begins with the feet — and many lifters swear it does — then unstable footwear could hamper your potential. The Benefits of Working Out Barefoot Training barefoot gives you: Better balance and stability. Direct ground contact creates a solid base compared to shoes, where cushioning and heel padding can mess with your weight distribution. Improved proprioception. That’s your body’s ability to sense position and movement. When your feet feel the floor, your brain can fine-tune balance and coordination. Better form. When lifting barefoot, your feet and toes can better grip the ground and maintain balance, which translates into better technique. Natural force transfer. Instead of force being absorbed by thick cushioning, it goes directly into the ground — and back up through your body. But most gyms won’t let you lift barefoot. Going fully barefoot isn’t always practical (or sanitary). That’s where barefoot training shoes come in. Barefoot Shoes for Weightlifting If you want the benefits of barefoot training with protection, a barefoot, zero-drop shoe is your best bet. Zero drop means your heel and forefoot sit level with each other. No artificial forward tilt. No raised heel throwing off your posture. Here’s why that matters: You stay closer to the ground. Your weight stays balanced. Your mechanics stay natural. Xero Shoes are designed with: A thin, flexible sole for real ground feel A wide toe box so your toes can spread for stability Lightweight construction so your shoes don’t become ankle weights Research even shows that simply walking in minimalist footwear strengthens foot muscles as effectively as dedicated foot exercise programs. Imagine what lifting in them can do. Strong feet = stronger foundation. Stronger foundation = stronger lifts. Tips For Transitioning To Barefoot Exercise If you’ve been wearing thick, cushioned shoes for years, your feet have likely been underworked. Don’t rush the transition. Start Slow If you’ve never worn minimalist shoes before, you’ll want to introduce them the way you would any new exercise or gear—slowly. Build Foot Strength You need to wake up your foot muscles, so start with easy foot balances and strength exercises. A 2019 study by Dr. Sarah Ridge found that walking in minimalist shoes strengthens the muscles in your feet as much as following a foot strengthening exercise program. Increase Gradually As your feet and muscles get stronger, slowly increase the duration and intensity of your workouts. Add just one new exercise or movement at a time to avoid overexertion. Listen to Your Body Some muscle soreness is normal. Rest when needed. Don't push yourself too hard too quickly or ignore any discomfort. The content of this post does not constitute and is not intended to be a substitute for professional medical advice, diagnosis or treatment. Always seek the advice of a physician or other qualified health provider with any questions or concerns you may have about your health or a medical condition.
Are Barefoot Shoes Good for Plantar Fasciitis?
It is estimated that around 10% of the population suffers from heel pain caused by plantar fasciitis. Interestingly, though the condition is quite common, we don’t know as much as you might expect about what causes it and how to treat it. I often hear from runners who have switched to barefoot-style running that they have experienced freedom from the plantar fasciitis that used to bother them. In this article, I’d like to share a bit about some research that points to a reason why this may be happening. If you suffer from plantar fasciitis, you may find this opens up some new directions to explore as you seek optimal foot health. I’ll start off with some important background about what plantar fasciitis is, what seems to cause it, and how it’s often misdiagnosed. Then we’ll look at some research that points to an interesting new approach to helping people find relief. What is plantar fasciitis? On the bottom of your foot, there is a thick band of tissue, called the plantar fascia, that connects the front of the foot with the heel bone. The plantar fascia helps to support the arch of the foot and absorbs shock when our feet hit the ground. The plantar fascia can become inflamed and cause stabbing pain in the heel. Typically, symptoms are at their worst upon waking in the morning and improve once you get up and move around. What causes plantar fasciitis? Many people believe that plantar fasciitis is caused by repetitive stress. Stresses to the plantar fascia can cause small tears and these, in turn, can lead to inflammation and heel pain. What causes this kind of stress? In the literature, certain risk factors are associated with a greater likelihood that a person will experience plantar fasciitis, like doing lots of running, having a higher weight, or being in an occupation that keeps you on your feet all day. This seems to make sense. If plantar fasciitis results from repetitive stresses to your plantar fascia, those factors sound like ways of ramping up the demands placed upon your feet. But what if it’s not repetitive activities, or weight, that’s the real cause of the problem? For example, what if running form is the issue? Some ways of running place a lot more stress on your feet than others. So, the standard description of the cause of plantar fasciitis encourages us to think in terms of a simplistic picture: that repetitive stress is the input and plantar fasciitis is the output. And yet you’re about to discover that there is an important mediating factor that has a lot to do with the stresses we’ll actually experience, whatever our activity level, and how those will impact our feet. Is it really plantar fasciitis? But first, plantar fasciitis can be easily misdiagnosed. Sometimes the symptoms of PF can be caused by overly-tight calf muscles which pull on the plantar fascia. Here’s how to check: try using a foam roller and/or deeply massage on your calf muscles and see if the symptoms improve. If they do, you know that you should pay attention to releasing that calf tension. What is the best treatment for plantar fasciitis? This is where things get interesting. There is a common protocol for treating plantar fasciitis. It involves rest (to give your feet a break from whatever is thought to cause the repetitive stress damage in the first place), stretching, and the use of ice and NSAIDs (think ibuprofen) for pain. The essence here is to treat the foot pain associated with plantar fasciitis by giving the feet a rest. Recently, some researchers are proposing a different tack. Patrick McKeon and colleagues, for example, suggest that perhaps what the foot needs most isn’t rest but exercise. This isn’t to say an acute inflammation of the plantar fascia might not need time for recovery, but they argue that the core strength of the foot is the key factor that determines how likely we are to experience injuries like plantar fasciitis in the first place. In other words, greater foot strength is the key to greater foot health, both when it comes to plantar fasciitis as well as with other repetitive stress injuries, including those typically associated with running. A clinical trial backs this hypothesis up. It found that strength training exercises for the foot and ankle resulted in better outcomes than stretching alone for those suffering from plantar fasciitis. Barefoot shoes and plantar fasciitis So what does this research have to do with barefoot shoes? Barefoot shoes (sometimes also called minimalist shoes) are designed to let your feet move as naturally as possible, as they would when walking barefoot. Barefoot shoes have zero heel-to-toe drop (also called “zero drop”), meaning the heel and forefront are level and the sole of the shoe is completely flat. In comparison, typical running shoes come with things like arch supports, thick padding, and elevated heels. Wearing “supportive” shoes keeps your feet from moving the way they ordinarily would. And guess what? Immobilizing your feet, which happens with arch support and stiff shoes, can make your feet weaker. Research by Katrina Protopapas showed that adding arch support in the shoes of healthy people reduced their foot muscle size and strength by as much as 17% in just 12 weeks. Conversely, when your feet are allowed to move, they can get stronger. Research by Dr. Sarah Ridge and others have shown that walking in minimalist shoes indeed strengthens the foot as much as doing a foot exercise program (And, by the way, she says Xero Shoes should give you the same benefits as the shoes used in her study.) So we can put these two ideas together: one group of researchers says strengthening the core foot muscles will help avoid injuries like plantar fasciitis. Another says walking barefoot (or in minimalist shoes) is effective in strengthening the muscles of the foot. What’s the conclusion? It looks like the evidence suggests barefoot shoes (or walking in bare feet) could be helpful for avoiding plantar fasciitis pain. Here I want to point you to just one more piece of research. It reports on a case where barefoot running was successfully used to treat plantar fasciitis in a female athlete. I know; it’s just one case. There is more research needed to confirm barefoot running (or walking) as a way to prevent or treat plantar fasciitis. But the evidence so far is encouraging. If you have ever developed plantar fasciitis, it is certainly worth looking into. If you’d like to try out wearing shoes that are designed to let your feet and toes move naturally, find your pair of Xero Shoes right here. The content of this post does not constitute and is not intended to be a substitute for professional medical advice, diagnosis or treatment. Always seek the advice of a physician or other qualified medical professional with any questions or concerns you may have about your health or a medical condition. Common questions you may be wondering about going barefoot I’ve been talking with people about going barefoot for a long time. I know there are a couple of common questions that come up. Just in case, I’m giving some brief answers here (and a pointer to where you can find more information). Are barefoot shoes really the same as going barefoot? Obviously, they aren’t exactly the same. When you wear shoes, you have a layer between you and the ground. You do lose something here; we all know that irreplaceable feeling when we kick off our shoes and feel our bare feet on the green grass. But there are downsides to bare feet. They don’t offer you much protection on rough or sharp surfaces and they don’t do much for you in the cold. Barefoot shoes are designed to get you as close to the barefoot experience while still providing protection to the foot. If you want barefoot running shoes (or any kind of barefoot shoes), just keep in mind what you should be looking for. Dr. Irene Davis defines barefoot, or minimalist shoes with these characteristics: They’ll have a wide toe box to give your toes plenty of room to move, splay, and breathe. They are zero drop, meaning they won’t have an elevated heel which can negatively impact posture. Barefoot shoes do not have unneeded cushioning. (Research from Dr. Christine Pollard shows, much to her surprise, that cushioning does not actually reduce impact forces.) Barefoot shoes won’t have unnecessary arch support. (Research from Katrina Protopapas shows that adding arch support to the shoes of healthy athletes reduced foot strength and muscle mass by as much as 17% in just 12 weeks.) They will have a thin sole that allows both flexibility and ground feel. The end result is that your feet will be moving as you walk and run, using and therefore can strengthen the muscles of your feet. If I’m interested in starting to walk barefoot or in barefoot-style shoes, how should I get started? The short answer is that you begin slowly and listen to your body. If you’re willing to listen, the feedback you’ll get from your feet will teach you how to walk in a natural, pain-free way. Think of it like going to the gym after a long break – you don’t do 8 hours of bench presses. You do one set, see how you feel the next day, and as your body tells you it can handle the load you add reps, or weight, or, eventually, sets. Use that same attitude and strategy when switching to minimalist shoes. If you want to maximize your chances of beginning well, you’ll want to have a look at our post on how to walk barefoot.
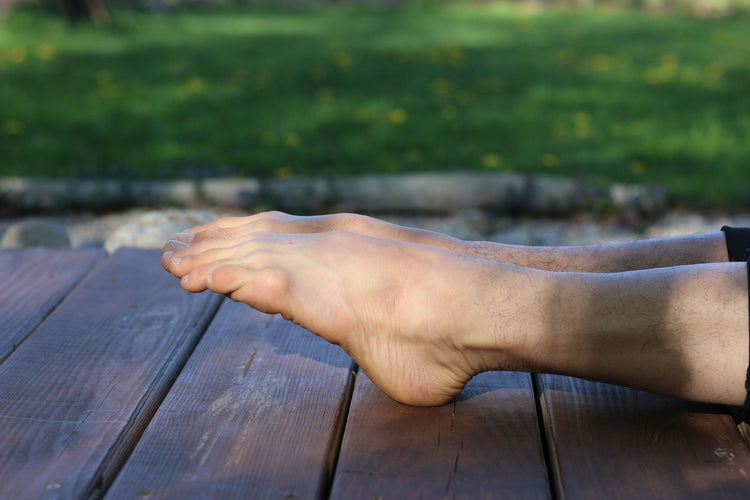
4 Exercises to Strengthen Your Feet (And Ankles)
I’ve always been a fan of shoes as a fashion statement. However, when looking cool or sexy becomes the priority over feeling good, we have a problem. It is no secret nowadays that the health of our body directly affects how we think and feel. The last 10 years of my life have been dedicated to helping others feel good in their body and mind. When it comes to feeling good, I always start with the feet. Why Are Foot Strengthening Exercises Important? Many of us know how to stretch and strengthen our abs, chest, shoulders, thighs, and buttocks. But what about the feet and ankles? Feet are the foundation of our posture, but they are often ignored at the gym. You can improve your overall well-being by practicing a few main joint movements of the ankles and toes. Further down I will go over a few daily exercises to improve your health from the ground up. Your Feet Affect Everything When I teach yoga – especially my hip-focused workshops, I spend 20% of the time on the feet and ankles. The health of your feet directly affects all of the muscles and joints above, including the hips, knees, and lower back. “Supportive” Shoes Are Only A Quick Fix I always find it comical that modern medicine provides these solutions for your foot problems: Shove a sole into your shoe to lift your arches for you Find shoes that articulate your ankles for you while you walk Don’t get me wrong, there is a time and place for these quick solutions. However, they are not a long-term solution that will make your feet stronger. Here is an analogy of what short-term solutions do to your body. Pretend that your body is a lazy employee at work, and your doctor is the manager. The manager can either: Teach us how to be productive and inspire us to take action Simply do the work for us and teach us nothing Firing the employee is not an option – you only have one body, after all! The best option, of course, is the one that is better for us in the long term. However, most of us don’t actually take the time to support our overall well-being. If you’re reading this, you probably aren’t a “lazy” human being. You are looking for solutions and answers, and you are willing to do the work. This is why you have chosen to wear barefoot shoes from Xero Shoes, isn’t it? You want to take care of your long-term foot health! So, let’s get into building strength. How Can I Make My Foot Muscles Stronger? In order to get stronger feet, let’s take a look at the four main actions of the ankle. Dorsiflexion Dorsiflexion is what we commonly refer to as flexing the feet. Stand on two feet and bend your knees, lean forward till your knees move forward. You’ll see the skin at the front of your ankle wrinkles, this action is called dorsiflexion of the ankle joint. Plantarflexion Plantarflexion is the exact opposite of dorsiflexion, and it is commonly known as pointing your foot as a ballet dancer would. Inversion Sit down with your legs out in front and turn the soles of your feet toward each other like you are making “prayer” feet. This is called inversion or inverting your ankle. Note, you may sit up on blankets or a couple of pillows if your hamstrings are on the tighter side. Eversion This is the opposite of inversion and is usually the most challenging. Stand up again, press the big toes down, and pull the outside edges of your feet up. You will see wrinkles form in the outer ankle, and you will feel the muscles along your outer shin engage. What Feet Strengthening Exercises Work? The following foot strength exercises will help to strengthen your muscles so you can perform the actions above: https://youtu.be/lPb3ZY13oY8?feature=shared 1. Seated Plantar flexion Sit down with your legs in front. Plantar flex and relax your ankles repeatedly with straight knees. You are trying to activate your calf muscles. Keep your feet everted by squeezing the inner ankles together. If you need to, you can use a yoga strap to help with the range of motion. Try without the strap as well to build up your foot strength. 2. Seated Dorsiflexion This action is the opposite of the first exercise. Sit down with your legs in front and pull the tops of your feet back. Release and repeat three times or more until you feel the heat building in the top of the shins. These muscles are your tibialis anterior muscles. 3. Calf Raises Stand upright with your feet flat on the floor. Plantar Flex your ankles until your heels lift. Try not to let your ankles roll outward during these. The target muscles here are called the gastrocnemius and soleus muscles. To keep the ankles from rolling forward, you’ll be using the muscles of the outer shins. 4. Inversion and Eversion Practice the inversion and eversion techniques described above. These exercises are the ABCs for your feet and ankles. Do them daily before getting out of bed to wake up all the muscles in your foot and ankle. Bonus: The Toes Take your foot exercises up a notch by spreading your toes. Also known as abduction, and you can do this either with a toe spreader or using your fingers to separate the toes. With time and repetition, you will be able to use your muscles to spread your toes. Until next time, Matt Giordano, aka @TheYogiMatt The information in this post does not take the place of medical advice. Only your doctor can provide advice, diagnosis, and treatment. Talk to your doctor or physical therapist if you have questions about your health.

5 Essentials to Pack for Your Next Adventure Travel Trip
There’s travel. And then there’s adventure travel. Adventure travel means different things to different people. It can mean a long backpacking trip through the Peruvian Andes. It can mean spending a month riding the longest rail line in the world. It can mean scrambling up a mountain side. Whether you’re bagging peaks, tackling every zip line a country has to offer, or hut-to-hut hiking in the Swiss Alps, one thing is certain... Packing space is at a premium, and if you’re carrying your belongings on your back, so is weight. Packing Light – Tips from a Career Digital Nomad Nora Dunn (aka The Professional Hobo), has traveled full-time for 12 years, two of which she traveled just with carry-on luggage. Which is to say, Nora knows a thing or two about packing light... and about how to pack for maximum comfort in a minimal amount of space. When it comes to what goes with you on an adventure travel trip, Nora’s favorite word is packable. Think about the bulky items you would typically take on a trip. Is there a packable alternative? Some things are essential no matter where you’re going and what you plan to do when you get there. If you can find a space-saving, lightweight version of those essentials that are tough, durable, and versatile, you’ve got a winner for your next adventure outing. Nora’s Five Essentials for More Rewarding Adventure Travel Experiences When asked about the things she couldn’t do without on an adventure trip, Nora had five must-haves that she recommends for any traveler, but especially for adventure travelers. 1. A Pair of Packable Shoes Shoes are one of the bulkiest, heaviest items you pack for any typical trip. A traditional pair of shoes is going to be rigid and take up a lot of space in your luggage. They’re also going to add a lot of weight. A packable pair of shoes is a game-changer. What makes a pair of shoes packable? They have thin, flexible soles and a soft upper. They fold in half easily or roll up to take up almost no space. And they weigh next to nothing. When Nora discovered barefoot-inspired footwear, it forever altered how she approaches choosing shoes for a trip. Her go-to for adventure travel is a pair of barefoot trail runners like the Mesa Trail II. She says, “I love trail runners... they completely revolutionized how I hike but then also how I travel. “For fifteen years I’ve been using trail runners and I love them for their versatility. They can do everything. They can take you on those outdoor adventures. But they can also be light and rolled up so they pack easily. You can wear them around town. They can double as a casual shoe.” Nora also mentions Xero Shoes Prio as one of her favorite shoes: “The Prio is an amazing shoe. You probably shouldn’t take it up a mountain, but I literally have worn them going up a mountain.” The Prio is versatile in terms of looks. It’s right at home in the great outdoors paired with shorts and a lightweight jacket. But it can transition to walking around museums, visiting local markets, or touring remote villages. The other part of choosing a packable shoe is all about the comfort. On an adventure trip, it’s a safe bet you’re going to be doing a lot of walking. And sore feet at the end of the day can steal your enjoyment. Even worse, if that soreness carries over into the next morning — few things are more disheartening than starting out your day with achy feet. When Nora first switched to barefoot shoes, she worried about the impact on her legs and feet. As a dancer, she has a long history of shin splints, and she wondered if less cushioning in her shoes would lead to more problems. She says, “I thought I might suffer from a lot of foot fatigue walking around in a barefoot shoe all day, especially around town, but quite the opposite has been true for me.” If you’ve ever been on a vacation or adventure where sore feet were a problem, you know that all-day comfort can completely change your experience... for the better. And barefoot shoes could do that for you. One caveat: if you’re new to the barefoot experience, take some time to transition to wearing barefoot shoes before your trip. 2. A Packable Backpack Next on Nora’s list of essentials is a packable backpack. A packable backpack is a lightweight, but sturdy backpack that squashes down into something smaller than a loaf of bread... some versions can pack down to be smaller than your fist! These are perfect for day trips and side excursions. Instead of carrying your full backpack or hauling around your luggage, you can toss a water bottle, sunglasses, sunscreen, a jacket, and a few snacks into your packable backpack and have everything you need at hand with very little fuss. Or you can pack it down, tuck it into your coat pocket and whip it out at the grocery store to avoid using disposable bags. 3. A Packable Water Bottle Like traditional shoes, a typical water bottle has a rigid shape that takes up a lot of space in your pack. And while they may get lighter as you drink your water during the day, they don’t get any smaller. By the end of the day, they’re just taking up room. A packable water bottle is a different story. They’re usually made from food-grade, BPA-free silicone or thermoplastic polyurethane. These materials are tough, completely waterproof (obviously), lightweight, and flexible. The key feature? You can roll them up when they’re empty. As you drink water throughout the day, your water bottle takes up less and less space in your pack. And the water bottle itself weights next to nothing. Many versions are also built to stand up easily when full, so they function like a normal water bottle... just better. 4. A Packable Down Jacket Staying warm is part of staying comfortable. A down jacket made of lightweight materials can pack down to the size of a grapefruit (or smaller). But on cool days and chilly nights, you can just give it a shake to fluff it out, and then pull it on for a reliable layer of warmth. 5. A Packable Raincoat Like the down jacket a packable raincoat packs down small and weighs very little. But if it’s windy or rainy out, it can help keep you warm and dry. Better yet, for those really cold days, you can layer your rain jacket over your down jacket to stay extra toasty and dry. All told, these five items together won’t take up much more space in your pack or suitcase than a pair of rolled up jeans. And they’ll provide loads of comfort without adding bulk or weight to your luggage. Bonus Tips for Your Next Adventure Trip Beyond these five essentials, Nora provided three bonus tips to help you plan and pack for a big trip. Tip #1 – Pack for Multipurpose For each item you pack, try to think of at least two ways you’ll use it on your trip. If you need it for only one thing, make sure that thing is really important to you. Otherwise, consider finding a different option that will give you more versatility. For example, Nora’s Prios work for her on trails but also look at home in restaurants and museums. And her two jackets together work to create a system for staying warm and dry in a variety of circumstances. Tip #2 – “Just in Case Has No Place” Anything on your pack list that you’re taking just in case you need it is something you can leave behind. On most trips if a situation comes up where you need something you don’t have, you’ll be able to buy it. And if not, there’s a good chance you’ll discover you can do without it anyway. Adventure travel is far more enjoyable when you don’t have a lot of stuff to keep track of or haul around, so take a minimalist approach to your packing list (just like you do with your shoes!) Tip #3 – Pack Lighter On adventure trips, and even on more traditional trips, traveling lighter frees you to have more fun, to feel better, and to enjoy the experience more. Review your packing list with a very critical eye and look for ways to reduce your weight that won’t compromise your comfort. Because, ultimately, traveling lighter will mean a more comfortable trip... and a more comfortable trip is a more enjoyable one. About Nora Dunn: Nora Dunn* (aka The Professional Hobo), is one of the OG digital nomads, and has been a career traveler since 2006. She traveled full-time for 12 years, 2 of which she traveled with carry-on luggage only. For the last five years she has had a home base in Canada and she continues to travel most of each year, for up to seven months at a stretch (almost always with carry on only) *Nora Dunn is an affiliate of Xero Shoes.